Use this step-by-step guide to create a project risk register. Find expert tips, download free templates, and learn how to calculate, assess, prioritize, and mitigate your project risks.
How to Make a Project Risk Register Step-by-Step
There are a number of ways to make a risk register. One way is to build a risk register from scratch that is customized for your team and project. This involves collecting the relevant information and documentation, identifying risks, and assessing risk impact. To develop a risk response plan, list risks by priority and assign each risk an owner.
Here is a more detailed step-by-step process for creating a risk register:
Gather Relevant Documents
Review any plans, risk registers, and lessons learned documentation from previous projects. By doing so, you can ensure everyone is clear on how teams managed and documented project risks in the past. Look at old templates to help brainstorm your current needs.
“Say you had a risk register template for software development. You would preload that template with things that have happened to other software projects." — Wendy Romeu, PMP, President and CEO of Alluvionic (project management and cyber security firm)
This encourages the team to think about all possible risks.
Gather Input
After reviewing relevant documents for past projects, gather input from project team members, managers, department heads, and other stakeholders who will be involved in the project, or who understand its goals and challenges. Use meetings, workshops, or asynchronous methods — such as surveys or one-on-one conversations— to surface concerns, assumptions, and unknowns. At this stage, the goal is breadth, not precision. Capture as many ideas and viewpoints as possible without worrying yet about structure or wording.
“Typically, we will have a ‘risk and opportunity’ review. You want to do those early on in the project and get the team in the room. It’s really a brainstorm. You’re trying to ask people to think of all the bad things that can happen and all the good things — or positive risks — that could happen.” — Luis Contreras, President of AzTech International
Learn more about the process of gathering input with this guide to project risk identification, which includes a workshop toolkit.
Identify and Describe Risks
Next, turn that input into clearly defined risks. Work with your project team — and a risk management professional if possible — to review the ideas gathered. Then, identify concrete risks relevant to the project. Ask team members to focus on risks tied to their responsibilities, and group risks into categories where possible. Confirm key risks with stakeholders or clients, and cross-check them against lessons learned from similar projects. While it can be difficult finding every potential risk, it’s worth it to spend time identifying risk categories.
Once you’ve identified your project risks, describe them in the risk register. The more details you can add, the better. For example, don’t simply list “Scheduling” as the risk. Add more details, such as, “Multiple project designers will be out of the office during the asset revision stage. This could potentially cause a project delay if the edits aren’t covered.” The more precise the description, the easier it will be to assess and respond to the risk later.
Assess Risk Impacts
Once you’ve identified your project risks, evaluate the consequences of each risk. If it occurs, how will each risk impact schedule, budget, scope, quality, resources, and stakeholder expectations? Understanding these consequences helps you determine where you may need contingency plans, backup resources, or alternative solutions.
Assess broader organizational and industry factors that could influence outcomes. For example, company-wide downsizing or layoffs could slow progress or remove critical expertise, particularly if multiple departments are affected.
After documenting potential impacts, assess both the likelihood and severity of each risk. Assign a value on a scale of 1–10 or 1–5 for each risk’s likelihood and impact. Use this formula to calculate risk score:
Risk = Likelihood x Impact
A more detailed risk score will also account for the risk’s exposure factor, or the level of downstream impact it may have. For example, an exposure factor of 1.0 means that a risk affects a single area (e.g., schedule only); 1.25 means it affects two areas (e.g., schedule and cost); and 1.5 means the risk affects three or more areas, or could trigger cascading risks. Once you’ve assessed these factors, use this formula:
Risk = Likelihood x Impact x Exposure Factor
Use these scores to prioritize risks, focusing on those with the highest potential impact on the project.
Prioritize Project Risks
Once each risk has a score, rank your project risks from highest to lowest priority. Focus first on risks with the greatest combination of likelihood and impact. These will often require immediate attention, clear ownership, and detailed response plans. Lower-priority risks may only need monitoring.
Make sure you take into account not just whether certain risks are interrelated or could have downstream impacts if they occur, but also when they occur in the project. Risks that could occur early in the project often deserve more attention because they can have compound effects later on.
Document priority levels in your risk register using consistent categories, such as high, medium, and low. Assign a risk owner to each high- and medium-priority risk to ensure accountability and ongoing review. Prioritization is not a one-time exercise. Revisit and adjust risk rankings as the project evolves, new information emerges, or conditions change.
Create a Risk Response Plan
This is the most important part of the risk register and will require the most work. Ensure that your risk response plan is thorough as well as direct. If a risk occurs in the project, you should be able to take immediate action with your plan. Document all your strategies and tactics, as well as measures your team plans to take to prevent or mitigate the risks.
For each high- and medium-priority risk, define a clear response approach, such as avoidance, mitigation, transfer, or acceptance. Specify triggers or warning signs that indicate when to activate a response, along with concrete actions, timelines, and any required resources. Where possible, include backup plans so the team can respond quickly if the initial strategy is not effective. A well-documented response plan turns the risk register from a reference document into a practical tool for decision-making.
Assign a team member to each risk to ensure that it is monitored throughout the project. The owner will be responsible for monitoring the risk, updating the team on its status, and implementing a prevention or mitigation plan.
“You don’t want to find out when the risk manifests itself. You don’t want to wonder: Who do I talk to? Is it this area or that area? — you want to know who’s on point for that risk.” — Jean Ballard, Director of Strategy and Solutions, ThoughtFocus
Continually Update and Adjust
Finally, add any notes to your risk register that don’t fit under the steps above. You can add notes at any point, but it’s best to jot down important items early so they don’t get lost. The team should revisit the risk register throughout the project and keep it updated as circumstances change. New risks may arise during the course of the project, and some risks may become more or less likely with time. Make assessments regularly, and update your prevention and mitigation plans where needed.
“Things [on the risk register] change; things become stale,” says Contreras. “Also, people will refine the risk. When they discuss it more, they’ll say: ‘Well, turns out this could really be the impact instead.’ As time goes on, some risks become less likely to happen after all, and then some may become even more likely to happen. You want to adjust that probability or likelihood column.”
“Depending on where you are in the project lifecycle, that risk probability, or that risk impact, can absolutely change. You may have had a risk score of 4.9 two weeks ago, but now that you’re in the middle of a supply chain issue, the impact and the probability of that risk have potentially grown.” — Kris Reynolds, Founder and CEO, Arrowhead Consulting
How frequently you revisit your risk register depends on the project timeline, your organization’s governance requirements, the risk exposure, project complexity, and more. Contreras advises: “For any project that’s a year or longer, you’d want to do it at least monthly. If it’s a shorter project, you might even do it more frequently.”
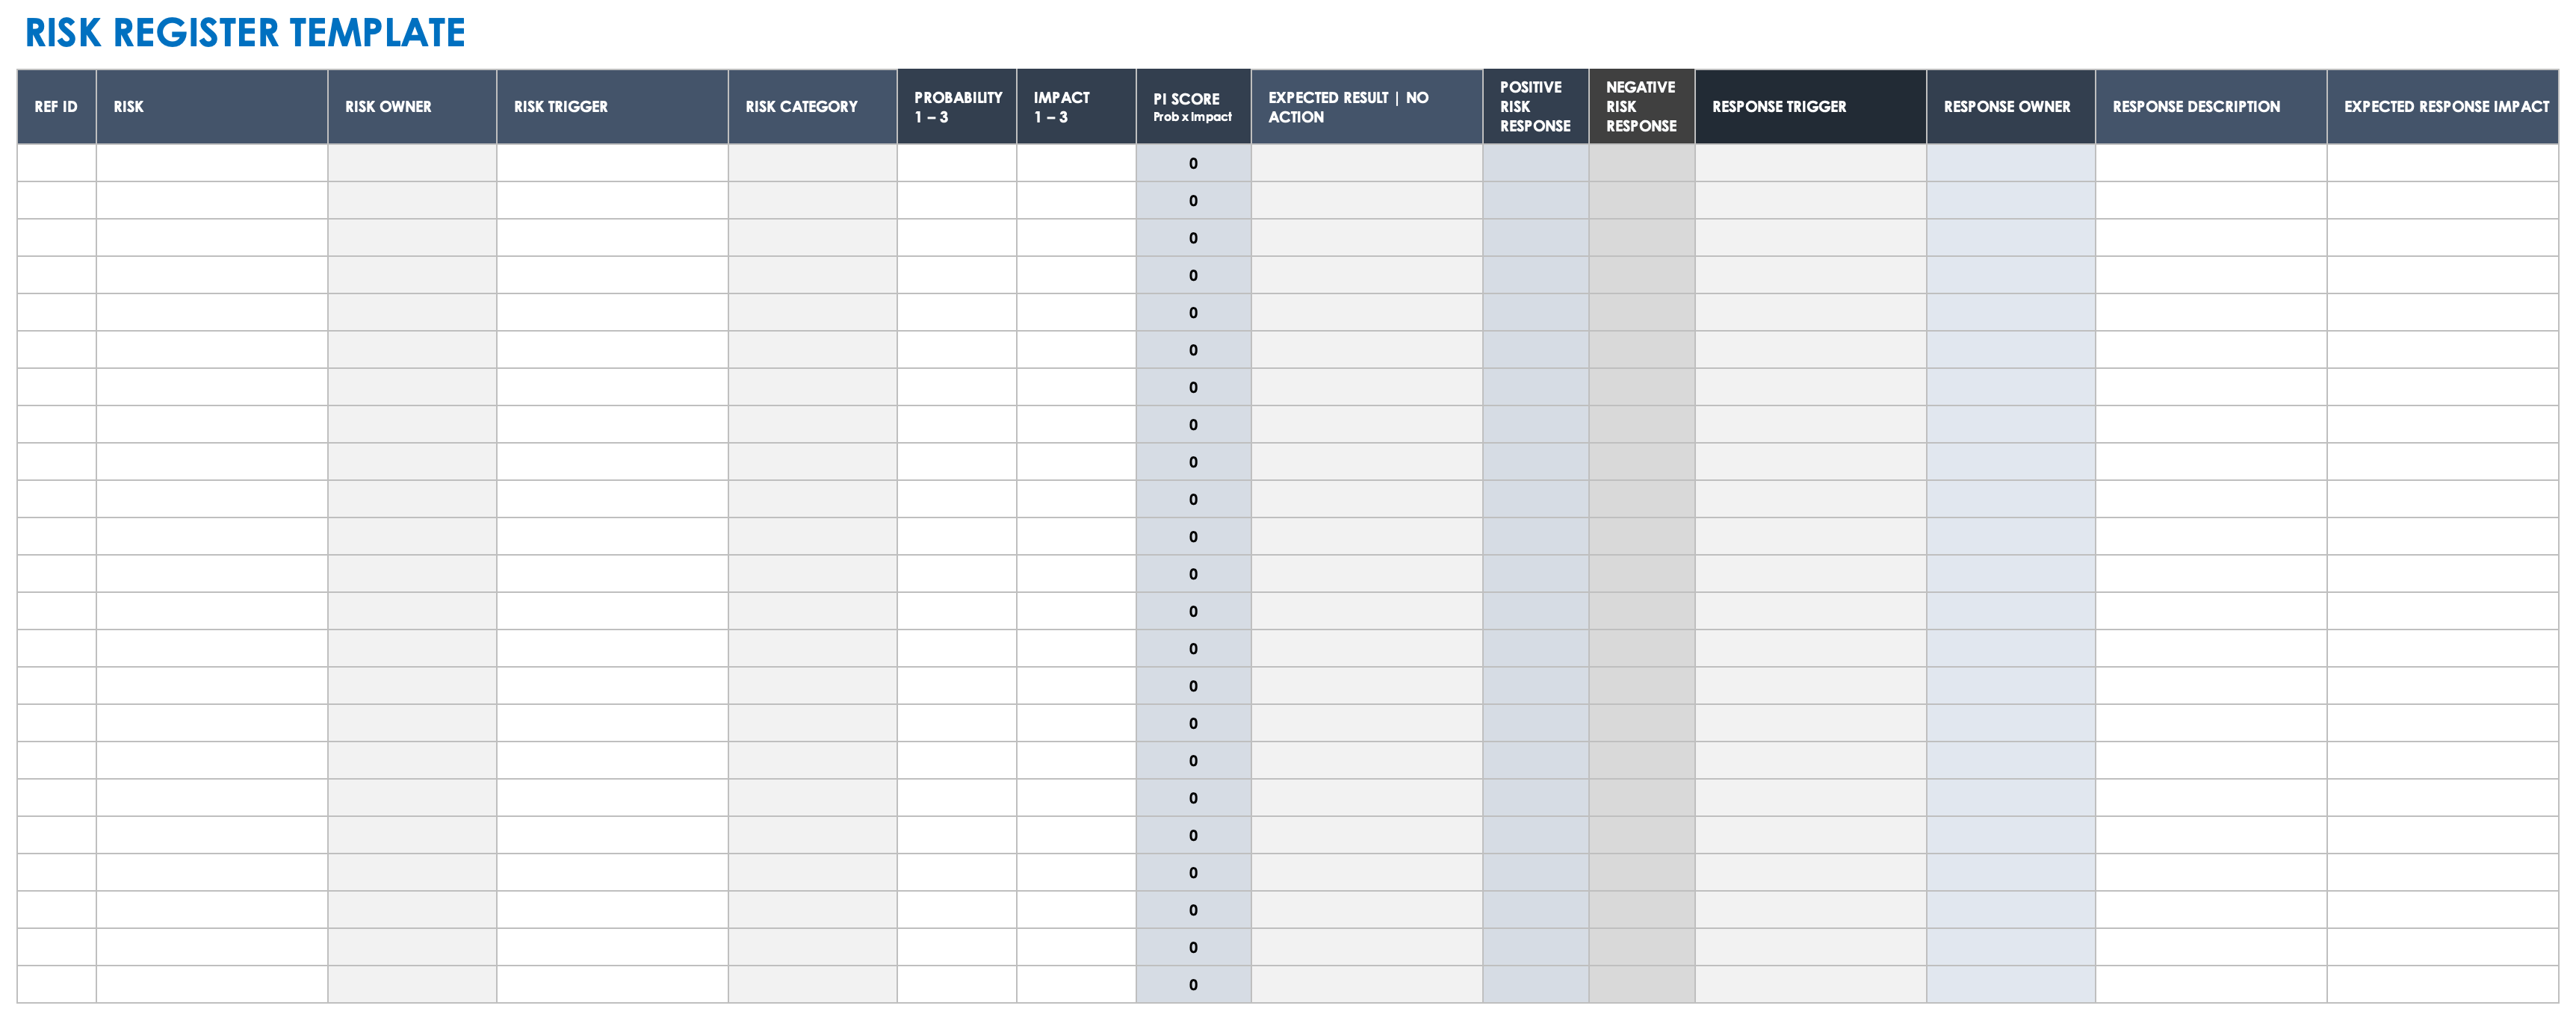
You can use a premade template, such as the one below, to create a risk register. It includes space to track each potential risk, assign a risk owner, note the risk severity and the probability of it occurring, and other details about how your team handled the response.
To make a project risk register in Smartsheet, you can start with a blank sheet or use a pre-built template for faster setup. Both options help teams centralize tracking and assess probability and impact. Assign owners to mitigation plans so your team can review and manage risks as project conditions change.
Follow these steps to create a risk register using a Smartsheet template:
Open the Risk Register Template
Click the risk register template link. If you're not already signed into your Smartsheet account, follow the prompts to sign in or start a free trial.
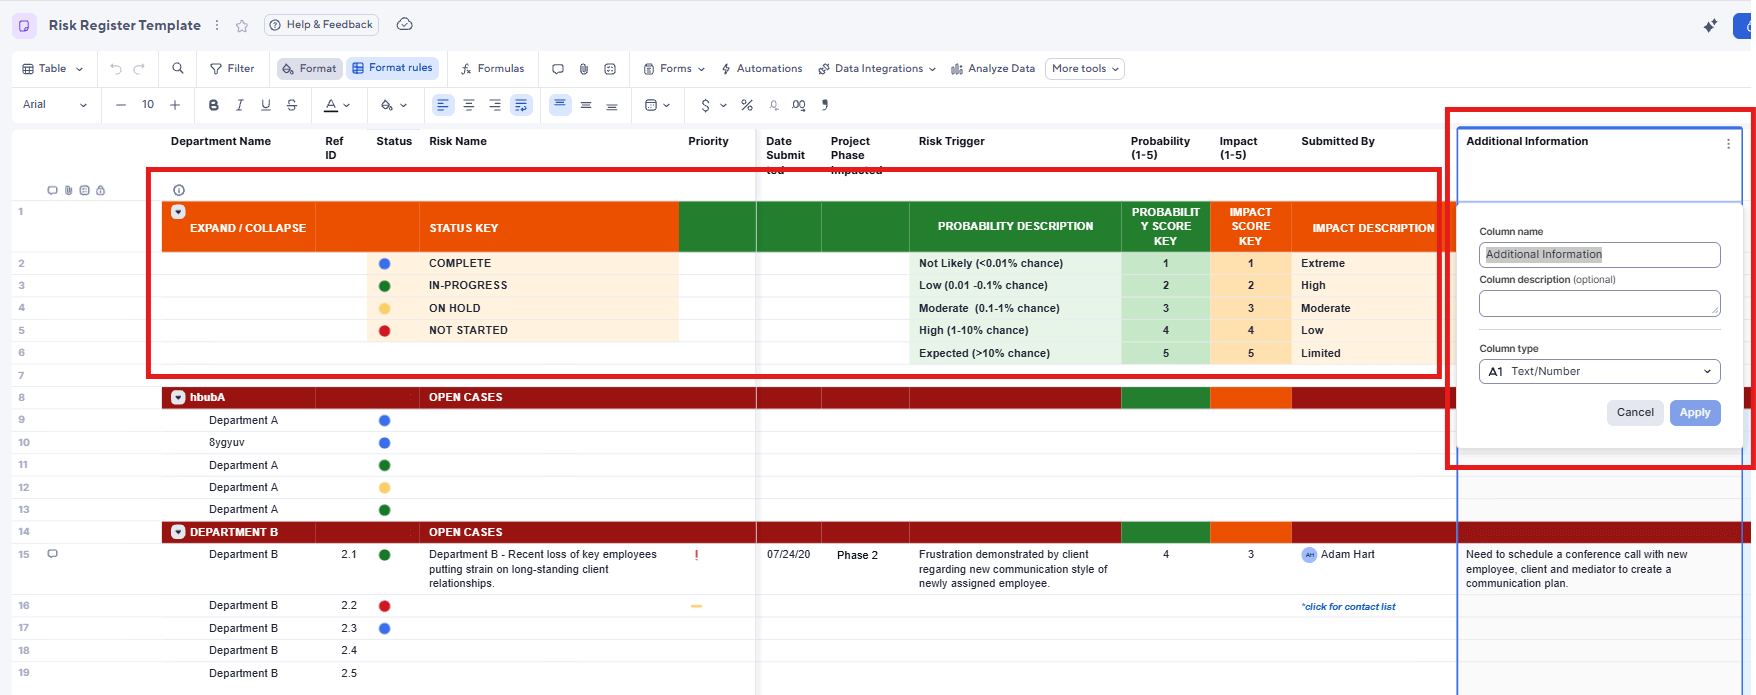
Review and Customize the Risk Register Columns
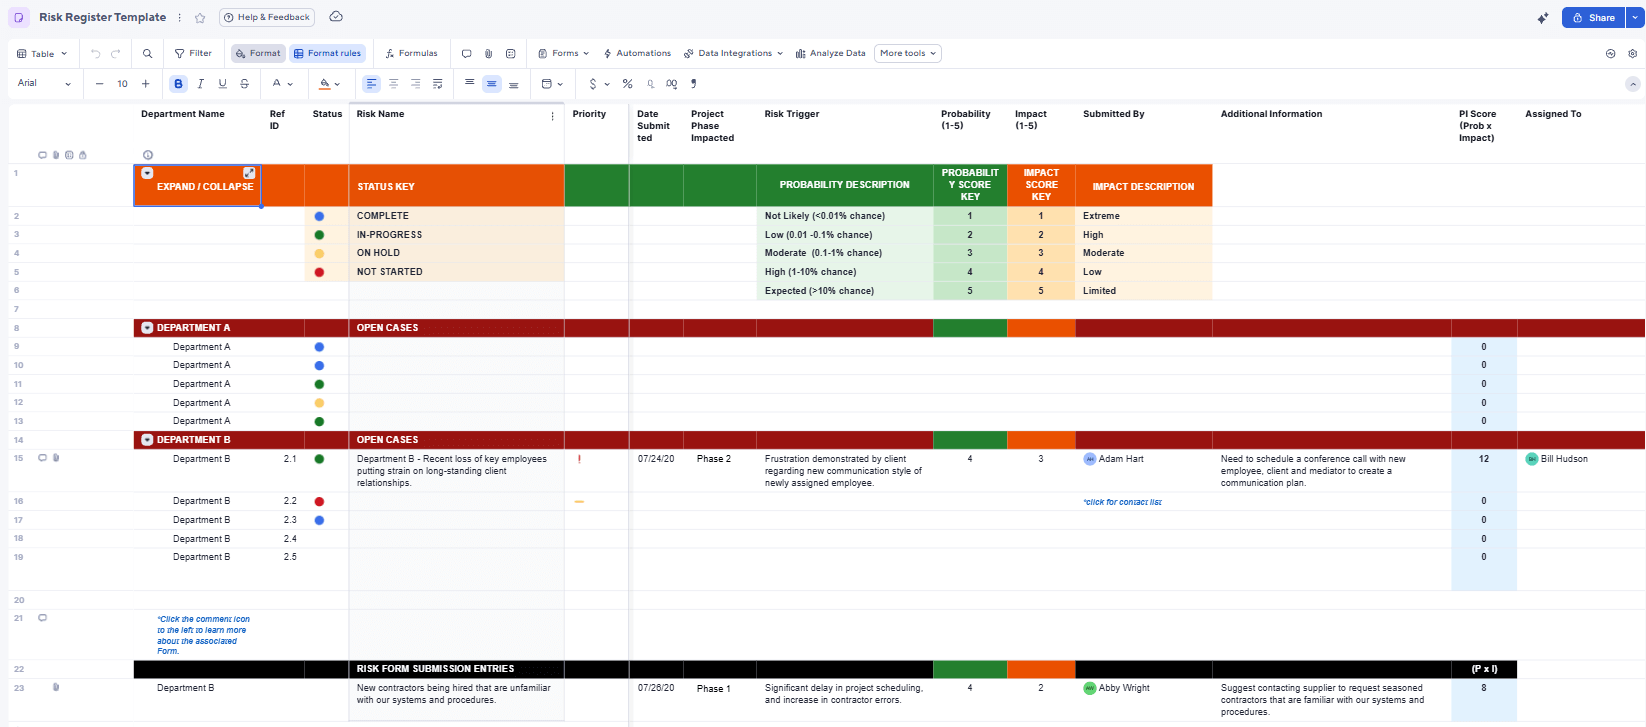
Review the built-in columns, such as Department Name, Risk Name, Project Phase Impacted, and Risk Trigger. Double click any column header to update the column name or to edit the dropdown values to match your project requirements.
At the top of the sheet, review the reference section that defines how values such as Status, Probability, and Impact are interpreted. Use this area to confirm or adjust scoring descriptions, status meanings, and priority thresholds so everyone assesses and tracks risks the same way.
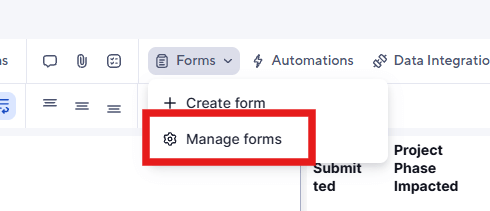
Collect Risks Using the Submission Form or Manual Entry
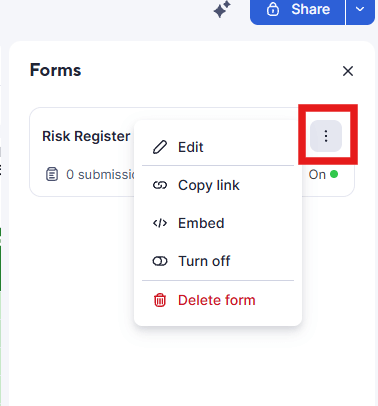
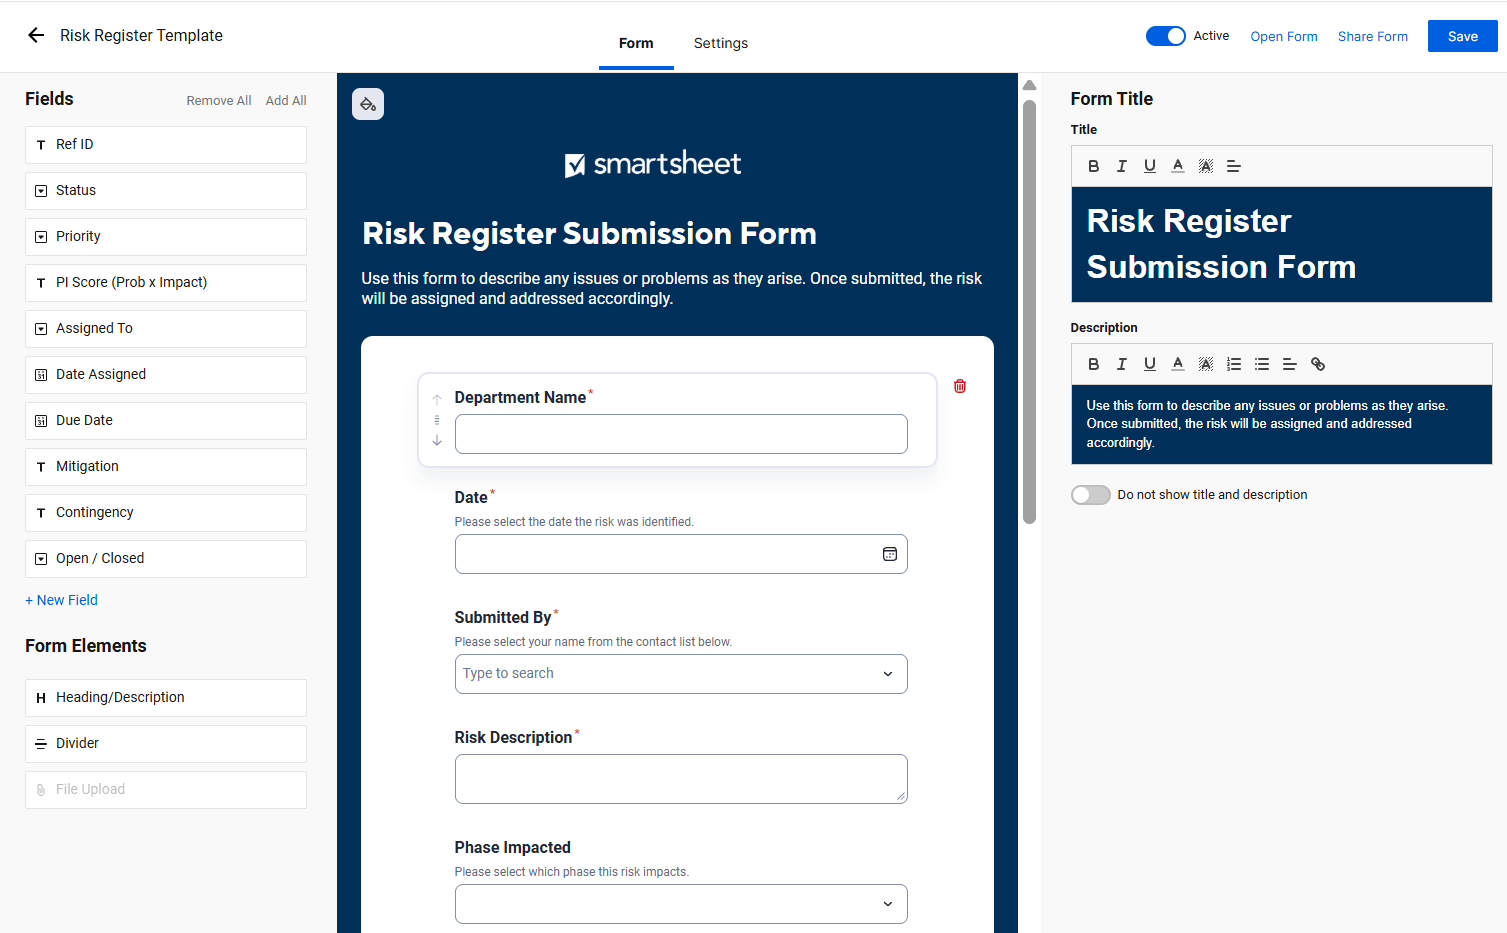
Open the Forms menu and select Manage Forms to edit the pre-built Risk Register Submission Form. You can add or remove fields to ensure you capture the right data. Share the form link to gather risks from stakeholders, or enter risks directly into the template. Each form submission automatically creates a new row in the register.
Confirm Probability, Impact, and Risk Score
Review the risks added to your sheet. Check the probability and impact values submitted through the form or entered manually. The template automatically calculates the PI Score (Probability × Impact) so you can quickly identify higher-priority risks that need attention.
Assign Owners and Define Response Plans
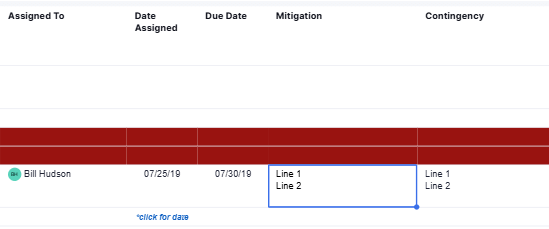
Assign an owner in the Assigned To column for each risk. Complete the Mitigation field to detail how you will reduce likelihood and the Contingency field with actions to take if the risk occurs.
Maintain the Register
Update the Status and Open/Closed columns as the project progresses, and revisit scores if probability or impact shifts.
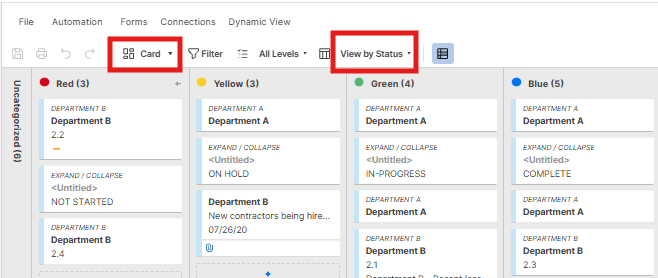
You can also switch to Card View and use the View by dropdown to organize risks into lanes such as Status, Priority, or Assigned To, making it easier to visualize workloads or progress.
Connect your people, processes, and tools with one simple, easy-to-use platform.