What Is Workflow Design?
Workflow design is the process of laying out all tasks and processes in a visual map, in order to give team members and stakeholders a high-level overview of each task involved in a particular process.
For a more in-depth definition of workflows, visit our essential guide to workflows, which contains the benefits they can provide your business.
How to Design a Workflow
To design the most efficient workflow for your processes, follow these step-by-step instructions.
- Diagram Your Tasks: Start by identifying the different tasks and activities in your process using a basic flowchart. Create clear start and end points so that you know how the process should begin and what needs to be completed in order to finalize it. Then document every task between the start and end points, and ensure that each step is properly integrated into the workflow design process. Remember to indicate the relationship between the steps (i.e., whether steps are contingent on one another or can be completed concurrently).
Read our guide on how to create workflow diagrams to learn more about the common shapes and symbols to use. - Consider Inputs and Outputs: Once you’ve diagrammed your tasks and identified their relationships to each other, consider both the inputs and outputs of your workflow. Attach all relevant information, including instructions for how each task should be completed, data or information needed in order to properly complete each task, links to source files, and checklists of the actions necessary to complete the tasks.
- Identify Sub-Workflows: Now that you have both your tasks and their attendant inputs and outputs documentation, identify any sub-workflows that make up your larger workflow. If possible, split your larger, linear flows into smaller, more digestible workflows to make complex processes easier to understand and complete. When possible, reuse processes from commonly used workflows since you already tested and implemented them successfully.
- Create Logical Loops in the Workflow Design: You can now identify how the workflow will progress. There are two main types of workflow loops: the “while … do” loop (while one task occurs, you complete another task in the meantime) and the “repeat … until” loop (continue doing a certain task until another task is approved). Identify which type of loop (or loops) best suits your workflow to avoid bottlenecking processes or lagging behind schedule.
- Incorporate Automation Wherever Possible: Once you’ve built all the main components of your workflow, try to incorporate as much automation as possible in order to simplify your workflow and eliminate repetitive, manual tasks. For example, you can automate the way your data is centralized or set up automatic notifications to alert stakeholders when a task is ready for review.
Workflow Design Template
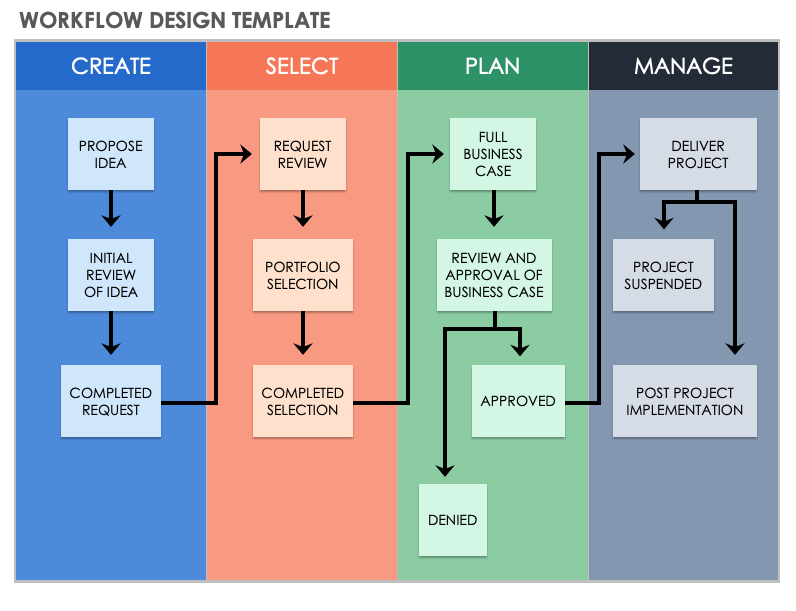
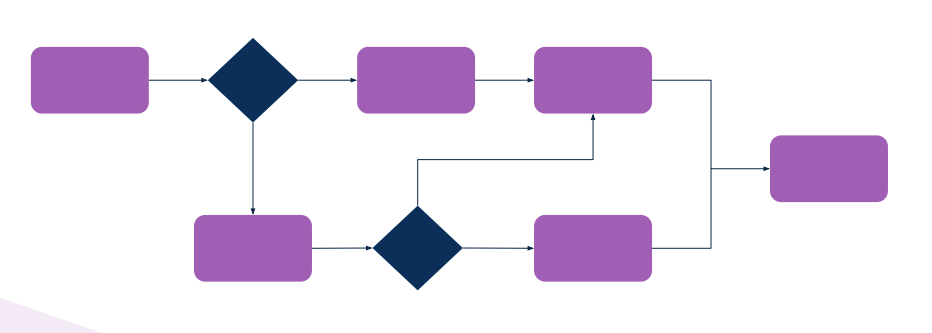
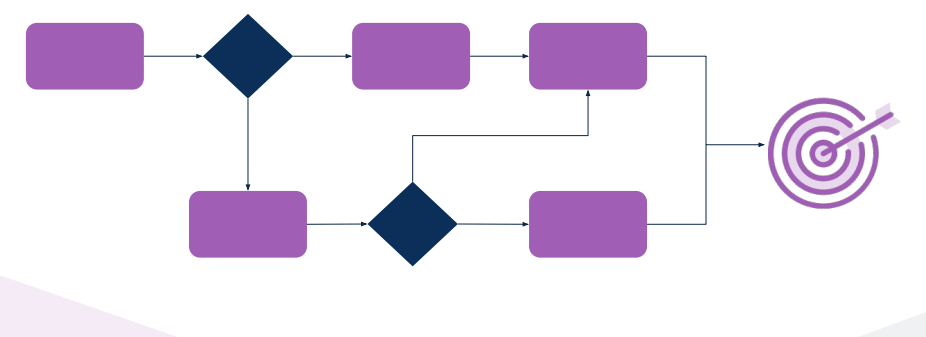
For an easy way to start a workflow, use this helpful workflow design template to get up and running quickly. In this template, you’ll find an easy way to track project progress, align your project strategies, and streamline your tasks, giving you the simplest, easiest-to-digest view of your workflow and all underlying tasks.
Download Workflow Design Template
Microsoft Excel | Microsoft Word | Adobe PDF
To use this template in Microsoft Excel, follow these easy steps:
- Click on the download button for the Microsoft Excel template format and open the template.
- Once the template is open, double-click in any of the title cells to edit the copy to fit the needs of your workflow.
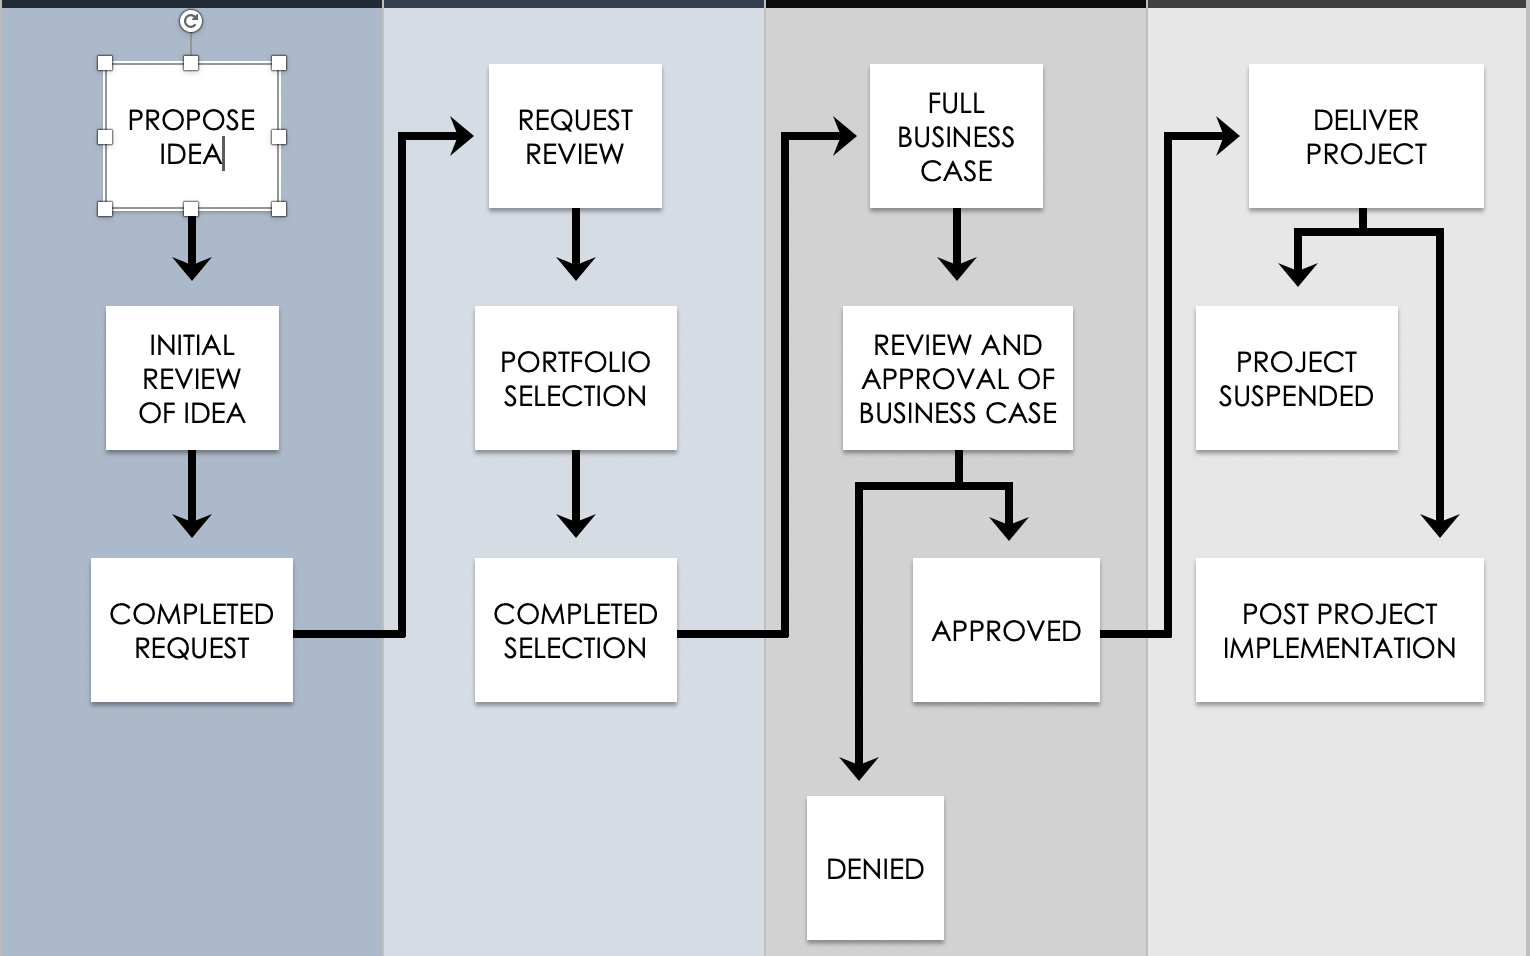
- Double-click in any of the shapes that make up the workflow to edit the copy for each of the steps in your workflow.
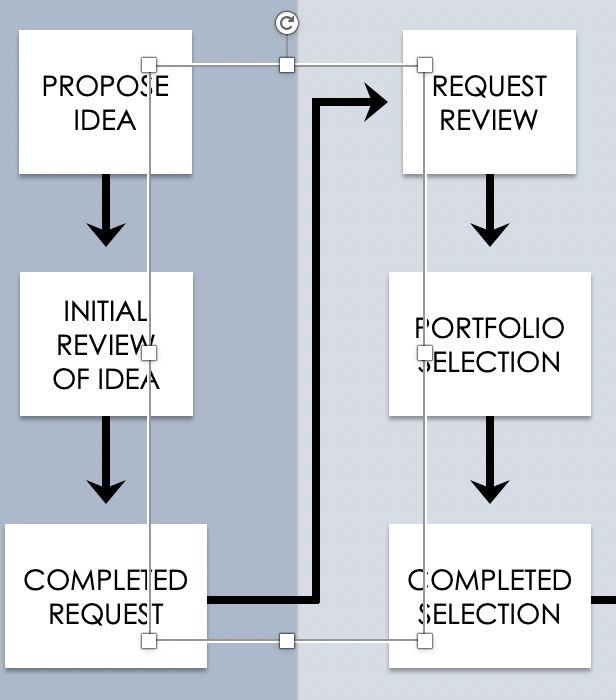
- Click on any of the arrows to move or reposition them to fit your process flow.
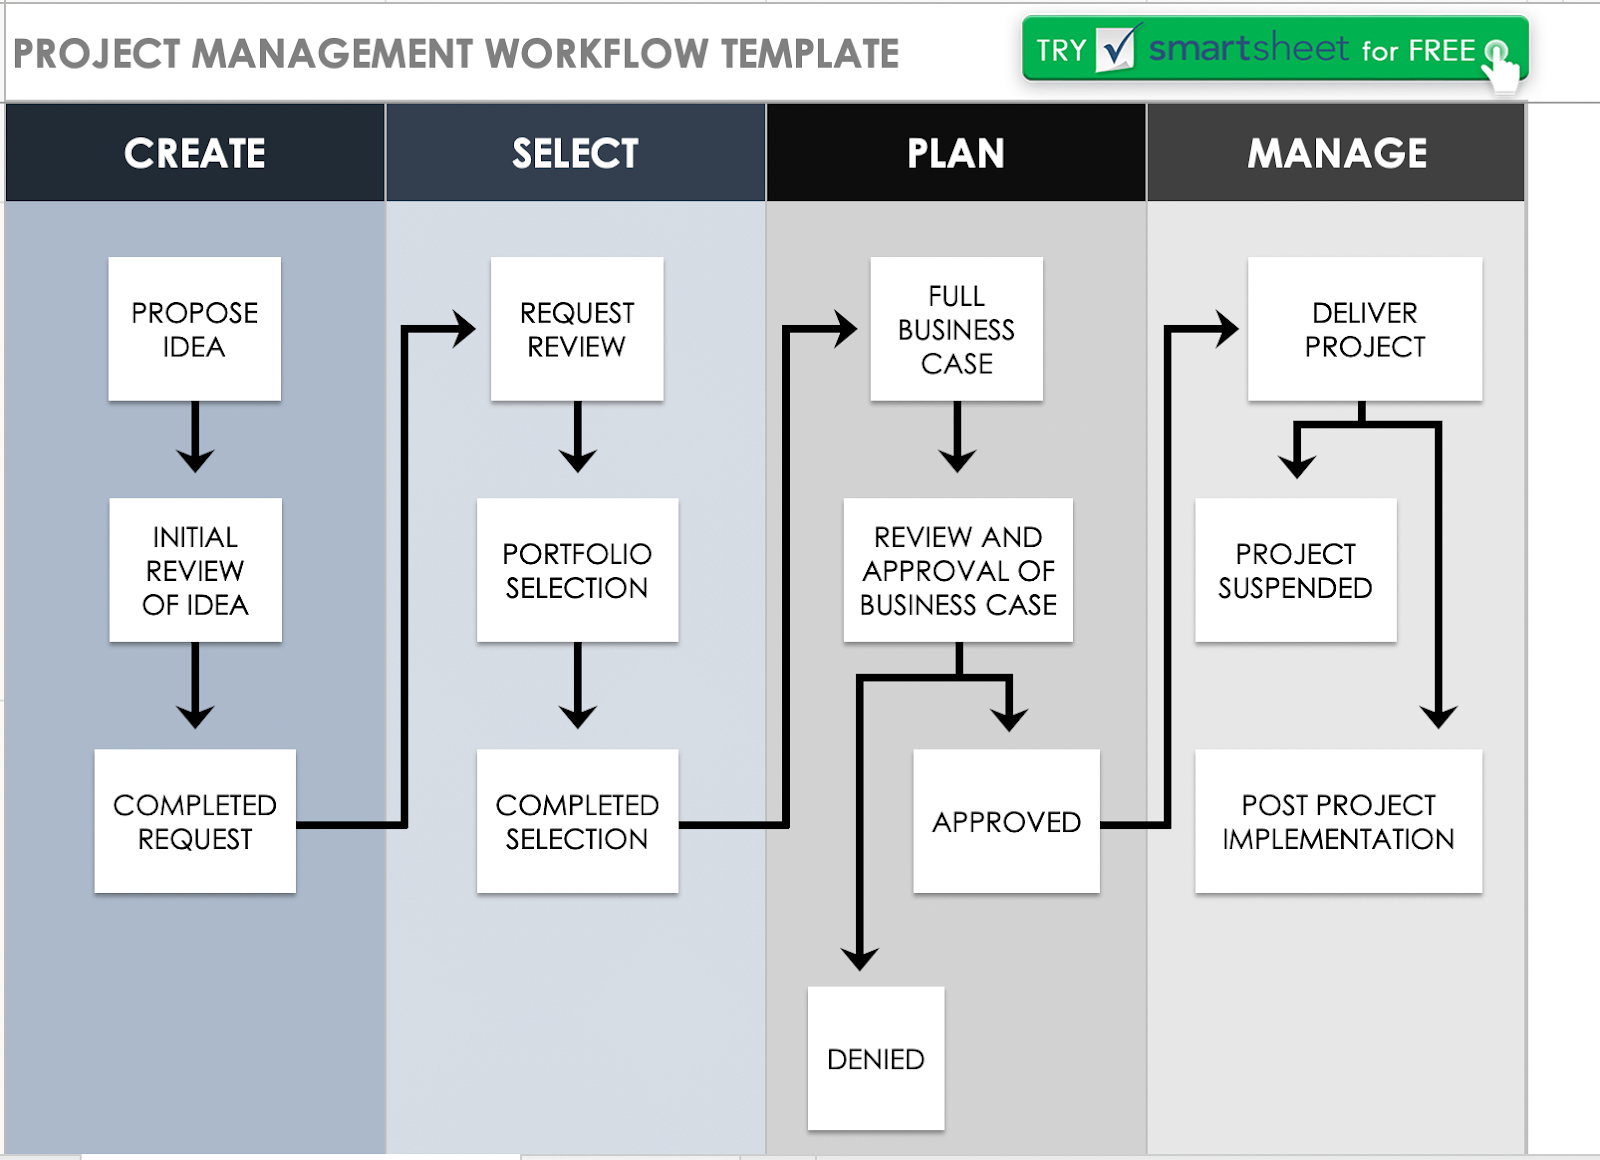
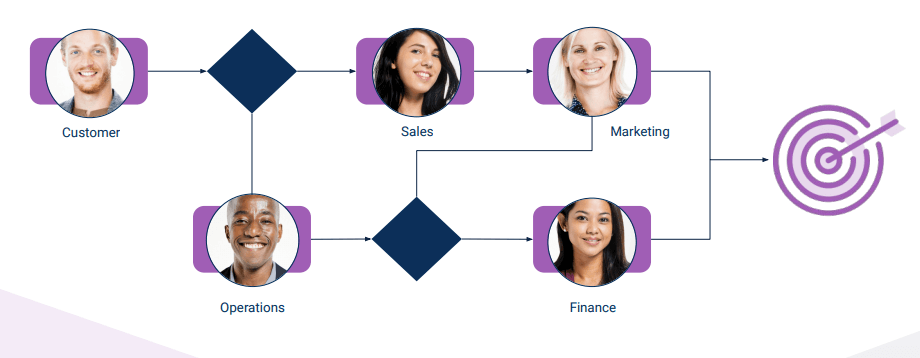
- Your completed workflow should look something like this once you fill it out.
For more free, downloadable options, visit our complete roundup of workflow templates.
Workflow Design Best Practices
In order to make the most helpful workflow for your processes, follow the best practices below:
- Know the Type of Workflow Design that Works Best for Different Processes: There are two main types of workflows: linear, which is best for short processes that aren’t error-prone, and state machine, which is best for process tracking. Identify which type of workflow you need to build and go from there.
- Include Only Relevant Lines of Business Systems: To avoid overwhelming your team and to make processes as simple as possible, include only the most relevant tasks (e.g., any data transfer should be done outside of your workflow).
- When Possible, Split Workflows into Sub-workflows: The use of smaller, more digestible workflows results in greater efficiency, quicker issue resolution, easier testing, and overall better workflow performance.
- Think of Workflows as Non-linear Processes: Workflows are designed to enable you to return to previous steps seamlessly without causing bottlenecks or lag time.
- Make Your Workflow as Visual as Possible: As you design, edit, and implement your workflow, keep in mind that the purpose of a workflow is to create a visual representation and depict tasks as they progress from one step to the next.
- Specify Your Workflow Modules: A modular workflow design should effectively support the addition or removal of new features or processes. Simultaneously, the workflow should also maintain a clear design so you can easily identify and fix any issues that might pop up.
- Categorize Your Workflow Steps Based on Priority: Use naming conventions or colors to differentiate priority levels among tasks so that team members can easily identify the most critical needs.
- If Possible, Leverage a Workflow Automation Tool: A workflow automation tool can help you more easily create and implement workflows, as well as eliminate the need for employees to spend time performing less productive tasks.
Ari Meisel, founder of Less Doing, offers this reminder: “When you’re designing a workflow, some of the best practices really revolve around trying to take your perspective out of the workflow [...] we’re designing the workflow for other people to be able to use efficiently.”
Meisel notes some specific questions to ask yourself as you design your workflow: “What would it be like if someone had never seen this before? Would they know how to do this step? Would this make sense? Would they have the appropriate resources, tools, etc.?”
As you work through your workflow design, make sure to constantly ask these questions to ensure you’re creating the most clear, concise, and effective workflow for your business needs.
Tips for Designing an Effective Workflow
To design the most effective workflow for your project or process, follow the steps below, which have been vetted by top workflow subject matter experts, like Ari Meisel.
- Create simple workflows for generic processes first, and then use them as templates for your larger, more complex processes.
- Include points of review or approval needed from stakeholders within the workflow to reduce bottlenecks.
- Create specific decision points within your workflow.
- Mark all completed tasks as Done in the workflow processes so that you can easily view which tasks are complete and which remain unfinished.
- Think of your workflow as a simple process flowchart.
Elements of Strong Workflow Design
A strong workflow should give you a visual overview of all the tasks involved. But it should also include a few key elements, such as the following:
- Inputs: This includes all labor, equipment, funding, and information that is required to complete each step of your workflow effectively.
- Transformation: This includes all the changes made during the workflows that create specific deliverables.
- Outputs: This is the result of the transformation.
These three workflow elements, when considered properly, should produce the following four results:
- A scheduled list of tasks, approvals, and reviews
- A reduced amount of spent on repetitive tasks
- A reduced amount of human errors
- A more consistent sequence of tasks that is repeatable
Meisel says that workflows must be repeatable and have clear elements that outline a process. “If you can’t put it in writing, then there’s probably something very unclear about it,” he says.
Pitfalls to Watch Out for in Workflow Design
As you design your workflow, try to avoid the most common mistakes and pitfalls, which have been identified by tried-and-true workflow experts.
- Executive Buy-In Does Not Necessarily Equate to Team Buy-In: Be sure to get approval from the team members who are actually involved in the process, not just from the stakeholders who have little real responsibility regarding the tasks.
- Don’t Rely on Only the Feedback You Get: Make sure to dig deeper to identify any possible issues with your workflow. Give your team members time to consider the workflow, then review, question, and challenge it.
Along these same lines, Meisel states, “One of the biggest pitfalls to watch out for when you’re designing a workflow is to take it out of your own perspective. It’s really easy to fall into a trap of skipping over steps.” To avoid this error as you’re designing and documenting your workflow, you should take all feedback you get and implement it as necessary. - Never Create Workflows without Fully Understanding the Need: Ensure you fully understand the process you’re redesigning before looking for ways to automate it or put it into a workflow.
- Avoid Complex Workflow Systems: Aim to keep it as straightforward as possible, and expect many roadblocks and issues to pop up along the way before you reach the most effective solution.
What Happens with a Bad Workflow Design
If you encounter any of the pitfalls listed above or otherwise design a workflow poorly, some consequences might affect your overall productivity:
- Inconsistent processes that are hard to repeat or teach to others
- Delays or idle time when tasks aren’t properly sequenced
- Misordered or skipped tasks when the workflow is hard to follow or not properly laid out
Meisel gives the following example of how a workflow can go wrong: “One of the examples I always like to give is that if you think about the average number of steps required to pay a bill, most people will say something in the single digits. And the actual answer is 23.
“What that tells us is that if you were to ask somebody to pay a bill for you, and maybe even explain it, it's very likely that you would explain the 7 or 8 steps that you believe there are without sharing the details of the remaining 13 or 14 steps that there actually are in the requirements to get the thing done. Giving that over to somebody else, they will end up stumbling over and over and have to come back to you for help. Again, we have to take that sort of outsider perspective when creating workflows.”
How to Become a Workflow Design Expert
Leveraging workflows across your business processes can help improve effectiveness and productivity, as well as offer a great return on investment. Below, we provide a workflow design starter kit to help you improve your processes as soon as possible.
Workflow Design Starter Kit
Download Workflow Design Starter Kit - PDF
To help you design the most effective workflow, we’ve put together a starter kit you can use to identify all the necessary components of your workflow and plot them in a process.
Pre-Design: Understand Your Process and Goals
- Process: Determine your process or the series of actions or steps that are taken in order to achieve a particular end goal.
- Goals: Identify the result(s) or achievement(s) toward which your process effort is directed.
- Roles: Define the functions or parts performed in a particular operation or process.
- Visibility: Provide a clear and unobstructed view of the operation or process.
Design: Identify Your Workflow Building Blocks
- Sheet: This is the “home base” where all of your data is stored.
- Forms: Forms can be used to collect data and information from anyone, and they can be sent via email or hyperlinks and even published to a website.
- Sheet Summary: This refers to the rollup of key information from your original sheet, which you can use to display key metrics and data points on a dashboard.
- Content Collaboration: Manage and review approval processes for all assets directly within the process to streamline review rounds and respond to feedback quickly.
- Reports: Pull data from multiple different sources to create high-level reports that answer key business questions.
- Automation: Use automation within your processes to simplify your workflow and streamline repetitive manual tasks, such as review requests, update requests, and status updates.
- Dashboards: Build a dashboard to surface key metrics across a program or process without exposing underlying data, and use it as a central source of truth that team members and stakeholders can reference.
Example Workflows
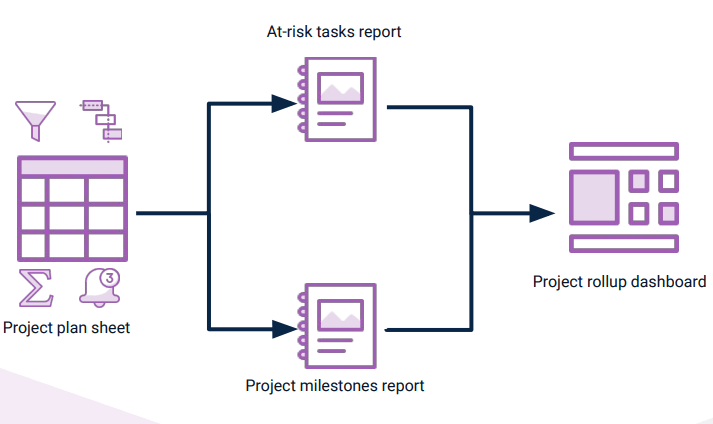
- Project Tracking Workflow: This workflow helps you streamline the way you track and manage your projects. Start by creating a project plan sheet for each project that you can then roll up into either a milestone report or an at-risk task report, depending on project status. Then surface those key metrics into a high-level dashboard to gain visibility into all project-related items.
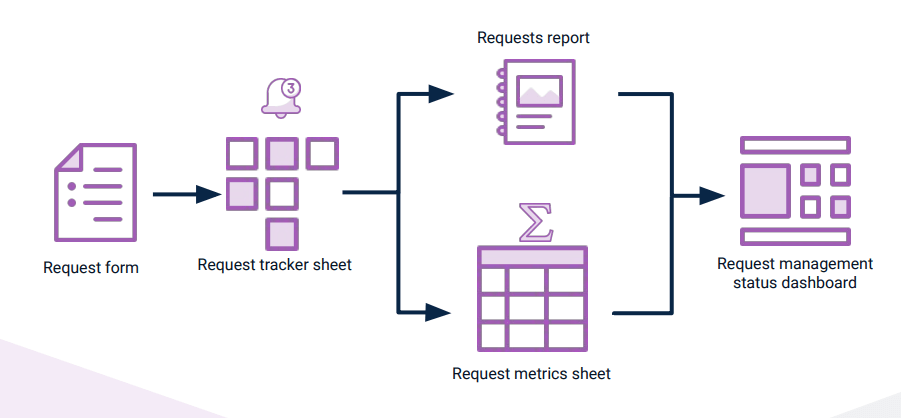
- Request Management Workflow: This workflow will help you capture and act on requests quickly and effectively. Create a form that requesters can fill out that will then filter into a tracker sheet. Then build a report to surface all request-related information that rolls up into a dashboard for increased visibility into all requests and their status.
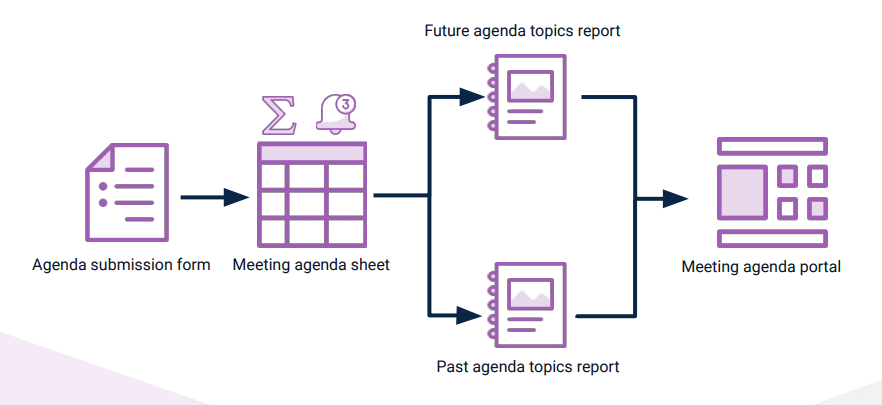
- Meeting Management Workflow: To hold better, more efficient meetings, use this workflow to build an end-to-end task sequence. Start with a form that allows people to submit agendas that then feed into a larger agenda sheet. Then create two separate reports: one for future agenda topics and one for past agenda topics. Surface all future and past agendas into a portal that allows all team members to see what has already been discussed and what is coming down the line.
How to Choose the Right Workflow Design Software
Workflow design software can help you create and implement effective workflows quickly and efficiently. But not all workflow design softwares are created equal.
Keep your core needs in mind when shopping around, as the right tool can help you achieve the following:
- Create a clear, high-level view of the entire operational flow, from start to finish.
- Enable collaboration, and allow for multiple stakeholders and team members to provide feedback in the design decision-making process.
- Contain an easy-to-use workflow design feature that provides a workflow canvas or template, so you can get started easily and without much learning.
- Clearly show the tasks, how they are connected, and who is assigned to what task.
- Include automatic notifications that alert stakeholders when something is ready for review or approval.
- Handle complex processes, such as invoice management, employee onboarding, and time-off approvals.
Meisel starts with using a pen and paper to create a first draft of his workflow. From there, he creates a more cohesive workflow by way of an automation tool or software, such as Process Street, which is “very basic in terms of its user interface, but very powerful in terms of its integrations with Zapier and its conditional workflow logic.”
How to Attack Workflow Design During the Era of Automation
To design workflows during this present era of automation, make sure to keep your workflows clear and concise. In addition, automate repetitive tasks when applicable.
Keep these additional tips in mind as you design your workflows:
- Incorporate automation and clear workflows in your current processes as much as possible to better adapt to an increasingly fluid and technology-driven world of work.
- Focus on ways you can make work less tedious and repetitive for your team members, and instead to make time for more productive, strategic work.
- Implement solutions and tools that create end-to-end visibility into your processes in order to keep up with the fast-paced nature of work.
Upsell: How to Design and Automate Workflows in Smartsheet
Smartsheet, a collaborative work management tool with powerful project management capabilities, provides an easy way to create and manage workflows in one cohesive platform.
Smartsheet enables you to create alerts and reminders for yourself or your team to automate your processes and make your workflows more effective.
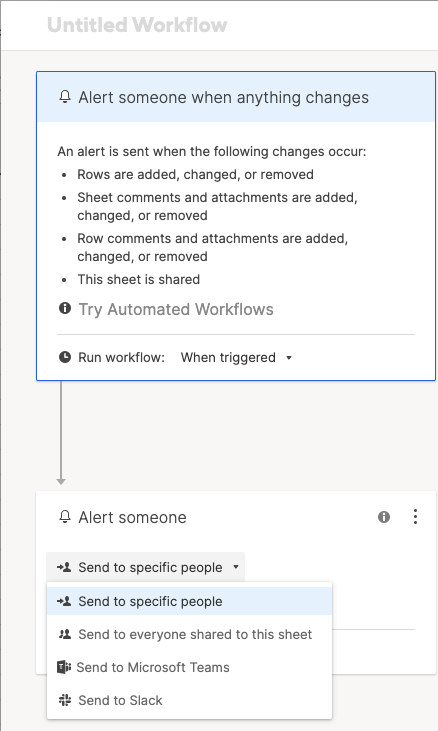
Specifically, the powerful workflows and automation capabilities in Smartsheet empower you to alert someone when anything changes, such as in the following situations:
- When rows are added, changed, or deleted
- When comments are added, changed, or removed on a row or on a sheet
- When attachments are added, changed, or removed on a row or on a sheet
- When the sheet is shared
Follow the steps below to create and document your workflows using Smartsheet.
Create a Basic Workflow
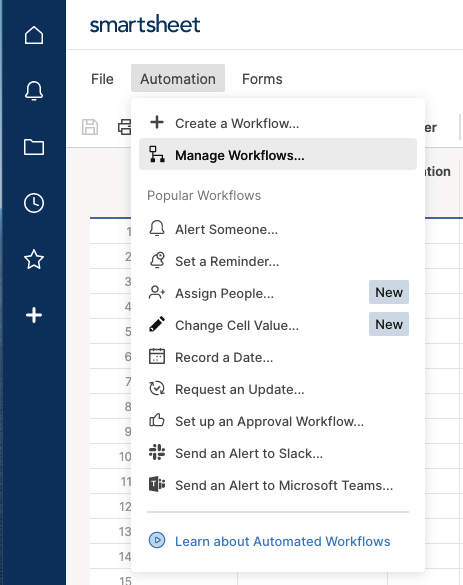
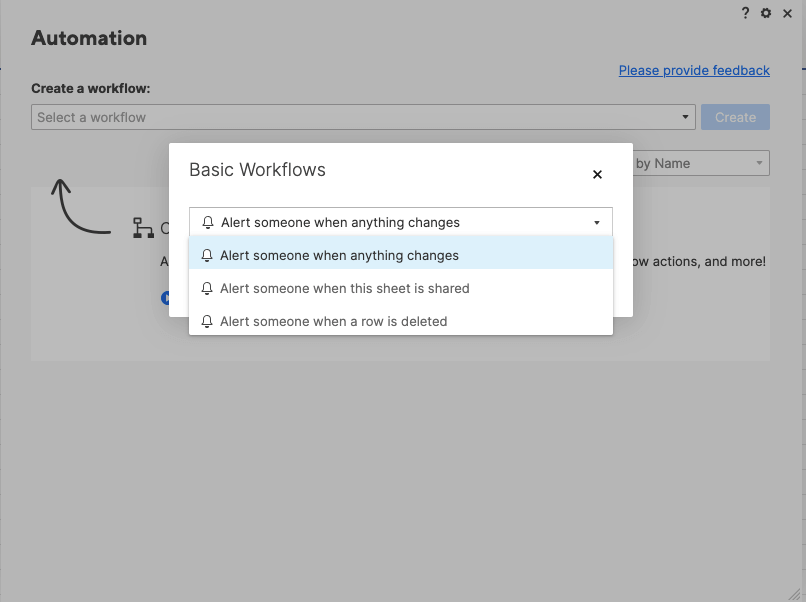
- Select Automation in the upper-left corner of your sheet, then Manage Workflows from the drop-down list.
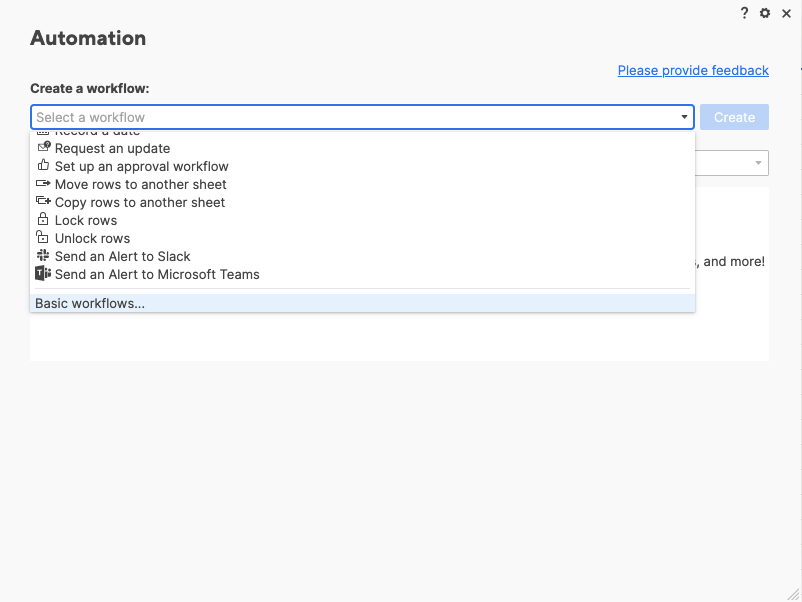
- Under Create a workflow, open the drop-down and select Basic workflows from the bottom of the list.
- On the Basic Workflows window, choose what kind of workflow you want to create (e.g., Alert someone when anything changes).
- After you select Create, you can modify the trigger, recipients, and custom message of the workflow.
- When you’re satisfied with the configuration, name and save the workflow. You now have a basic workflow.
Automate Your Processes More Effectively with Smartsheet
Empower your people to go above and beyond with a flexible platform designed to match the needs of your team — and adapt as those needs change.
The Smartsheet platform makes it easy to plan, capture, manage, and report on work from anywhere, helping your team be more effective and get more done. Report on key metrics and get real-time visibility into work as it happens with roll-up reports, dashboards, and automated workflows built to keep your team connected and informed.
When teams have clarity into the work getting done, there’s no telling how much more they can accomplish in the same amount of time. Try Smartsheet for free, today.
