How to Use a Timeline Template in Google Docs
To use a timeline template in Google Docs, open it and then customize the dates, events, and details to fit your project. You can modify the design by adjusting fonts, colors, and layouts to match your preferences.
Follow this step-by-step guide to use a Google Docs timeline template.
- Open the Timeline Template
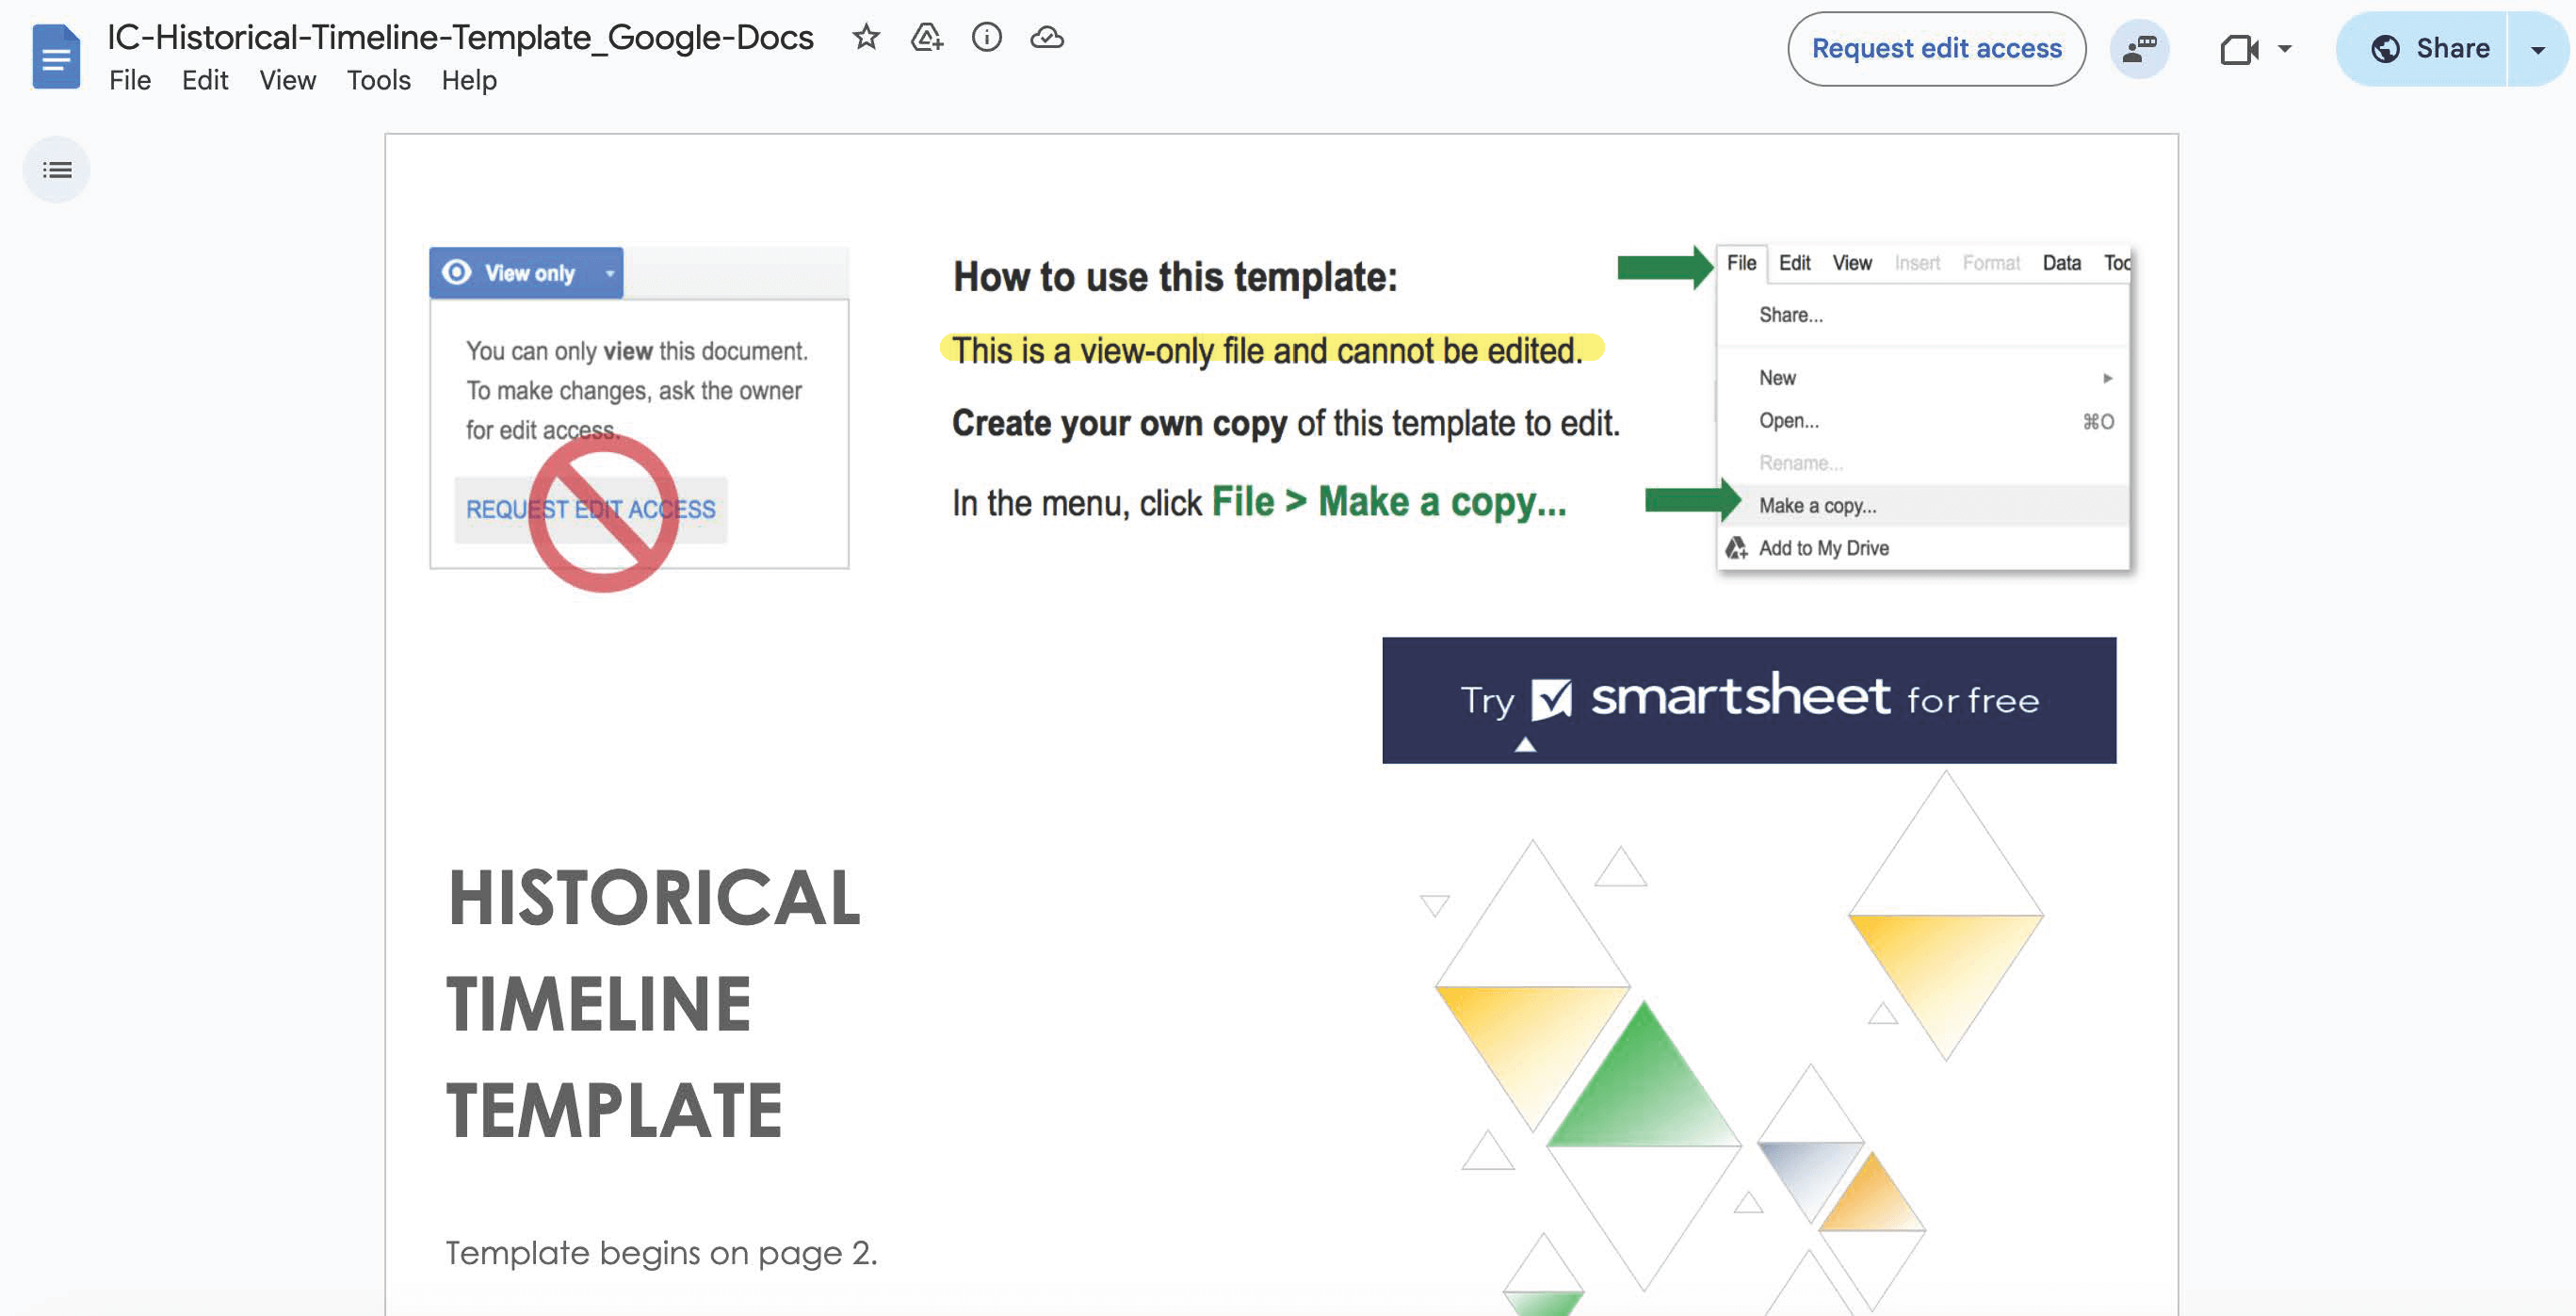
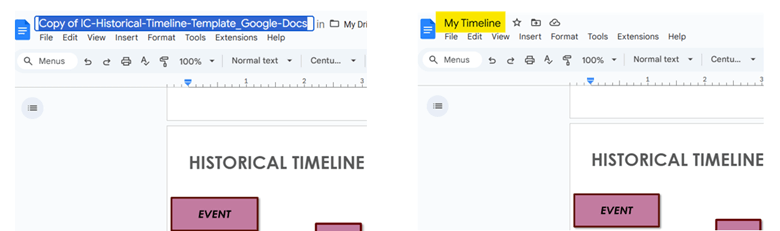
Open the historical timeline template. This document is view-only, so you’ll need to make a copy.
- Make a Copy of the Template
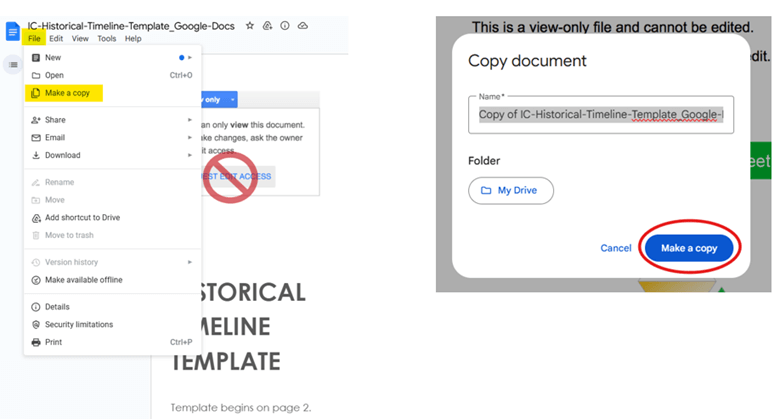
To make a copy of the template, click File > Make a copy. Name the document, choose a folder to save it in, and click Make a copy.
- Customize the Template
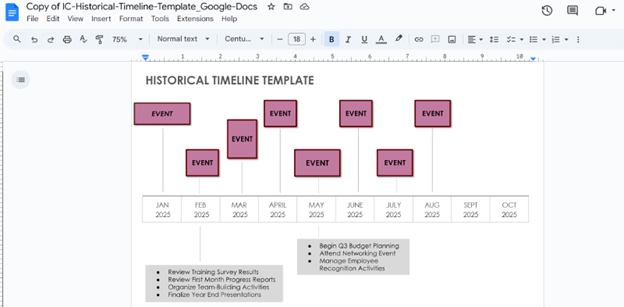
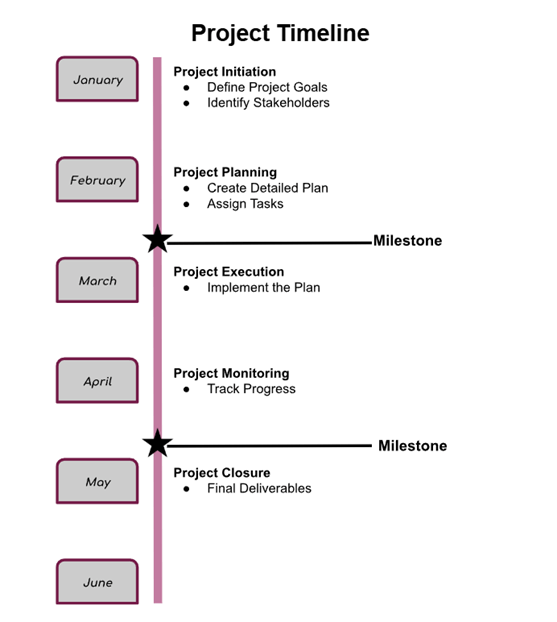
The template will open with pre-filled sample data, as shown below. You can customize each element to fit the specifics of your project.
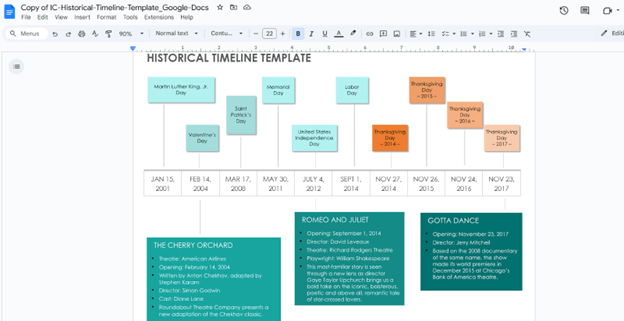
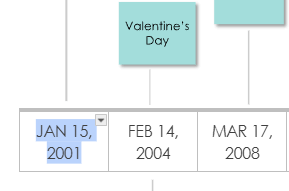
Customize the dates by highlighting them and entering years, months, weeks, or days.
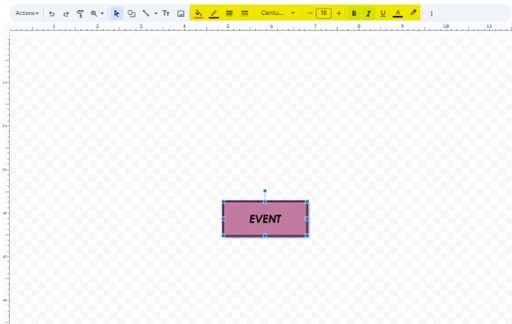
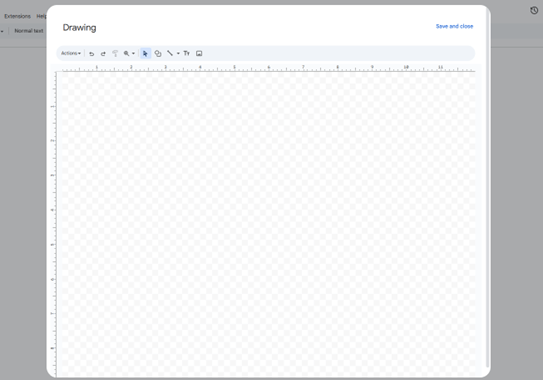
Customize the text box data by double-clicking a text box. The drawing canvas will open, and you can apply changes directly.
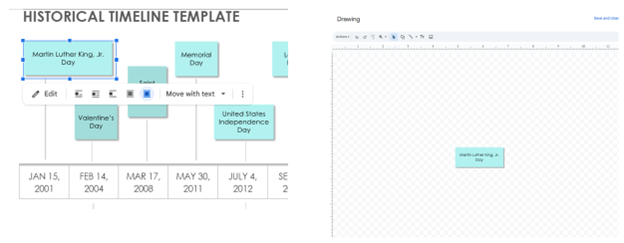
Customize the text font, color, border, and more using the drawing canvas toolbar. Click Save and close to return to the document.
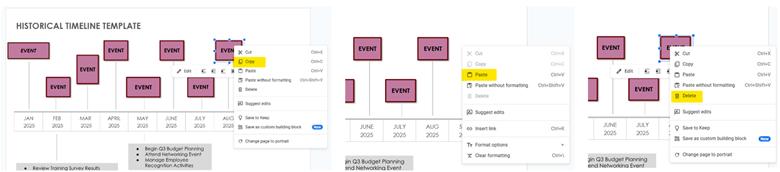
Customize the number of text boxes using Copy and Paste. Depending on your timeline needs, you might also use Delete.
- Rename the Document
Highlight the document name in the upper-left corner to rename it. Google Docs automatically saves your document in the folder where you originally saved it.
Check out additional features and formats with these timeline templates for Google Sheets, Docs, and Slides.
Video: Create a Timeline in Google Docs

How to Make a Vertical Timeline in Google Docs
Vertical timeline templates are ideal for longer, more detailed timelines because they afford more space to prevent the layout from becoming crowded. Google Docs offers simple tools to create these timelines, so you can organize events in a clear, easy-to-follow format while maintaining a professional appearance.
Follow this step-by-step guide to create a vertical timeline in Google Docs.
- Open a New Google Document
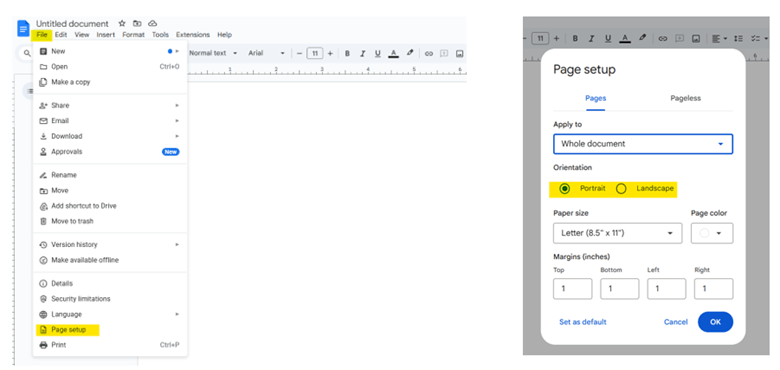
To create a new document, click New > Google Docs > Blank document.

- Select the Page Orientation
From the new document, click File > Page setup > Portrait.
- Name the Document
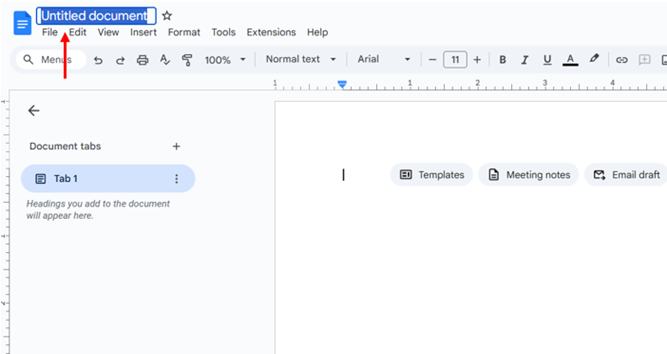
Highlight Untitled document in the upper-left corner, and enter a name for your document.
- Open the Drawing Tool
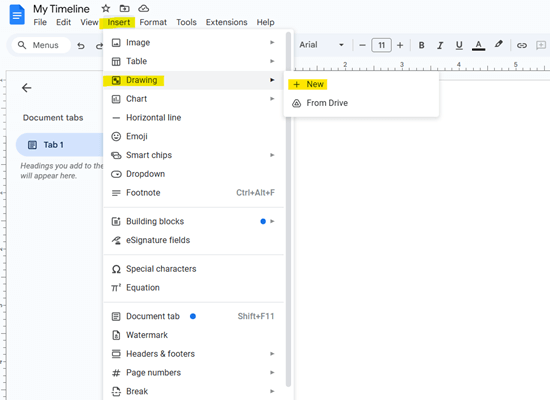
To open the drawing tool, click Insert > Drawing > + New.
A checkered drawing canvas will open on top of your document. Use the toolbar within this canvas to build a timeline.
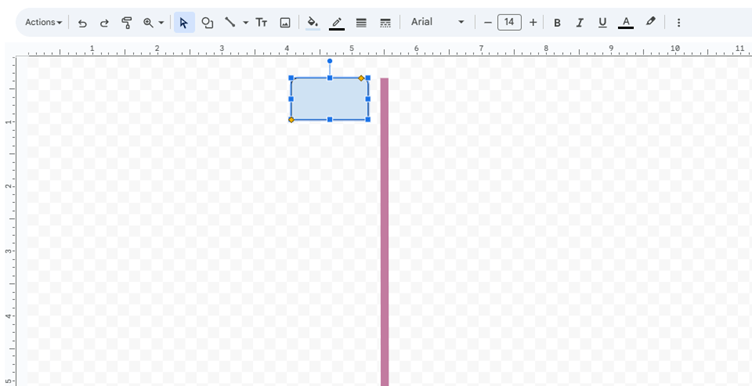
- Create the Base Line
Select the Line tool. Drag your cursor vertically along the canvas to create a straight line for the base of your timeline.
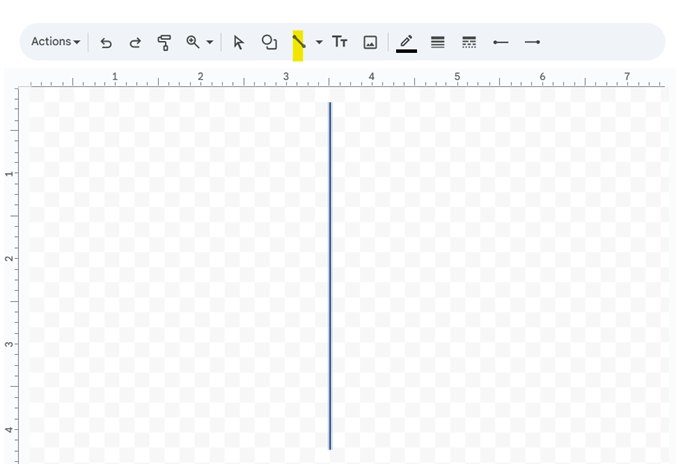
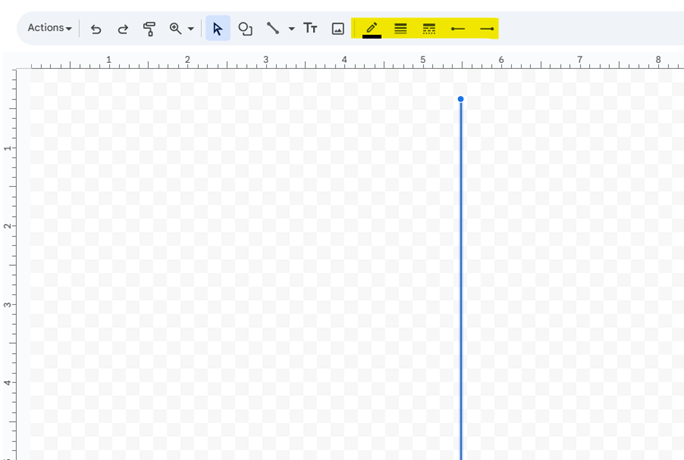
Format the line using the Line Color, Line Weight, Line Dash, Line Start, and Line End tools. You must select the line for these tools to appear in the toolbar.
- Add Dates
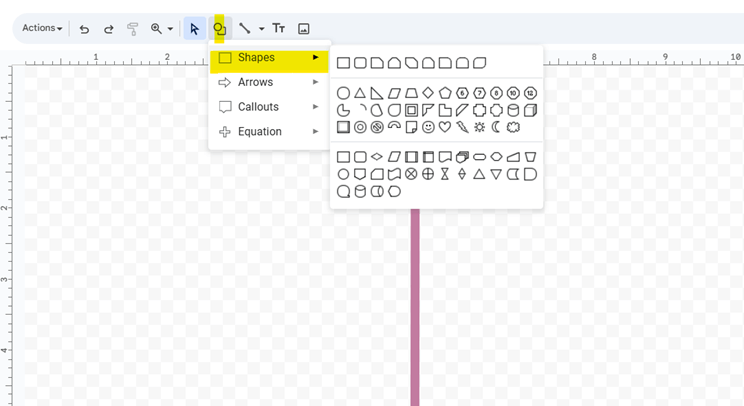
To add dates to your timeline, you need to insert shapes that you can fill with text. Click the shape icon from the menu, hover over Shapes, and select a shape. You can also use the Text Box tool (TT) to add shapes without a border.
Drag your cursor onto the canvas. Depending on the length of text you add, you might need to adjust the size of the shape: Do so by dragging the corners or sides.
Format the shape using the Fill Color, Border Color, Border Weight, and Border Dash tools.
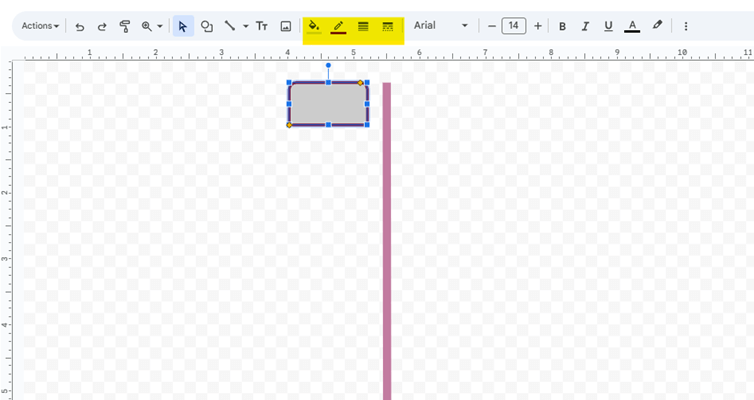
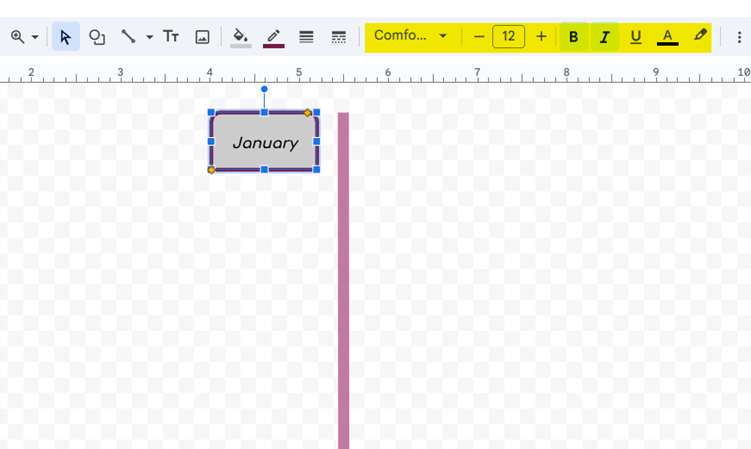
Enter text into the shape or text box. Text can include days, months, weeks, or years. Format the text using the Font, Font Size, Bold, Italic, Underline, and Text Color tools.
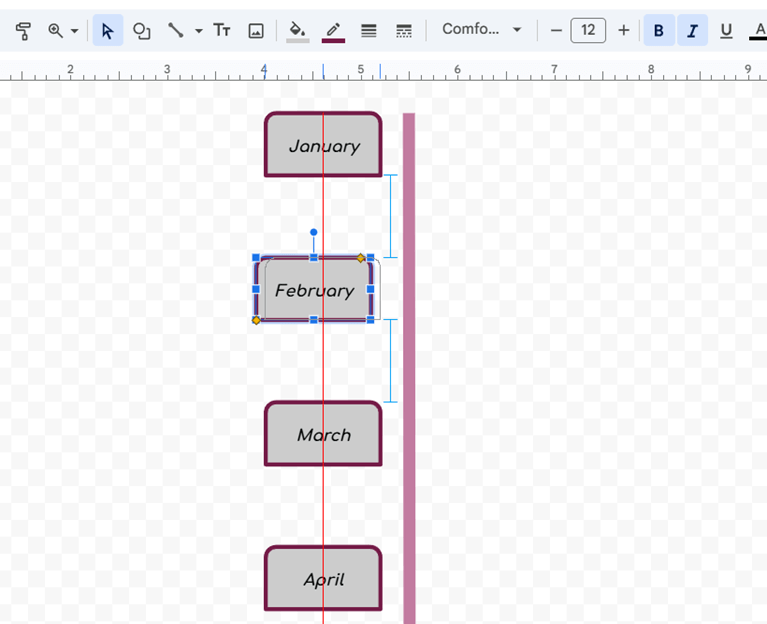
To duplicate the shape, right-click on it, click Copy, and then click Paste. Continue to paste the shape until you create the desired amount. Position the shapes chronologically alongside the line.
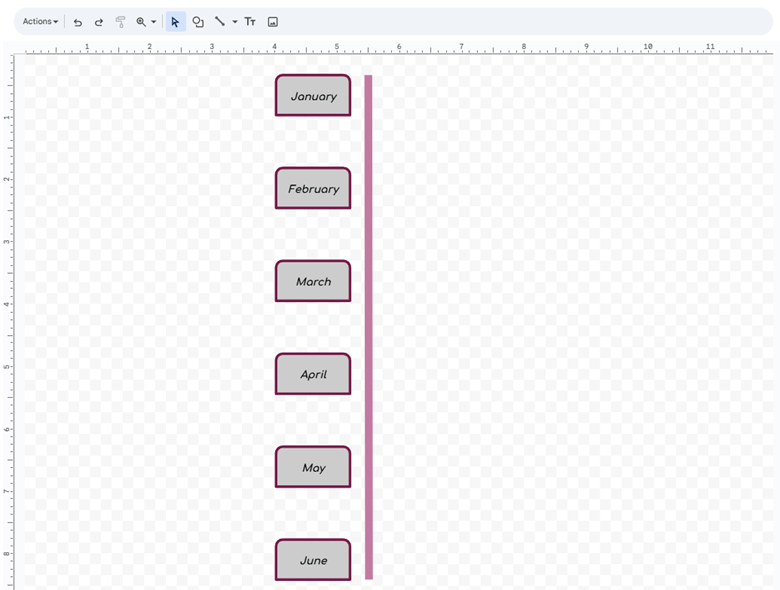
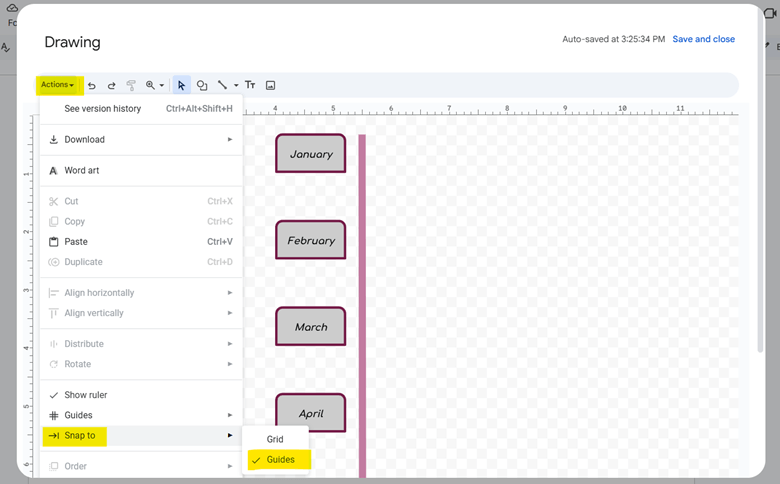
To space the shapes and text boxes evenly, activate the Guides feature. Select Actions > →| Snap to > Guides.
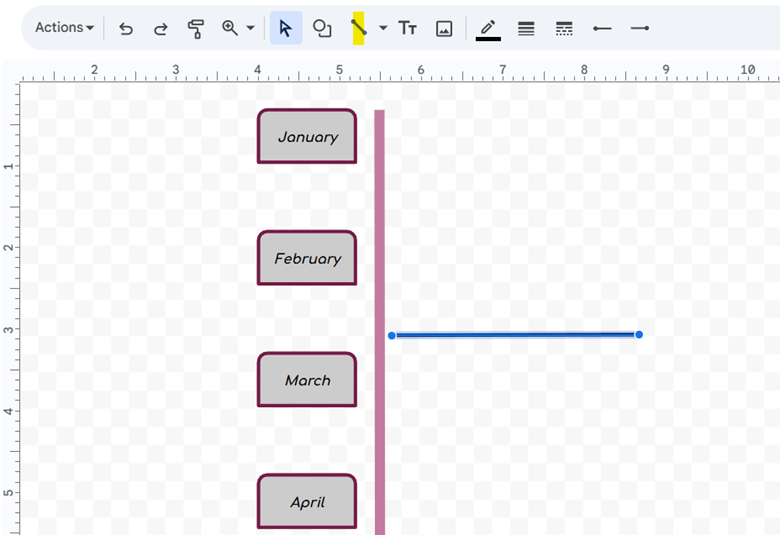
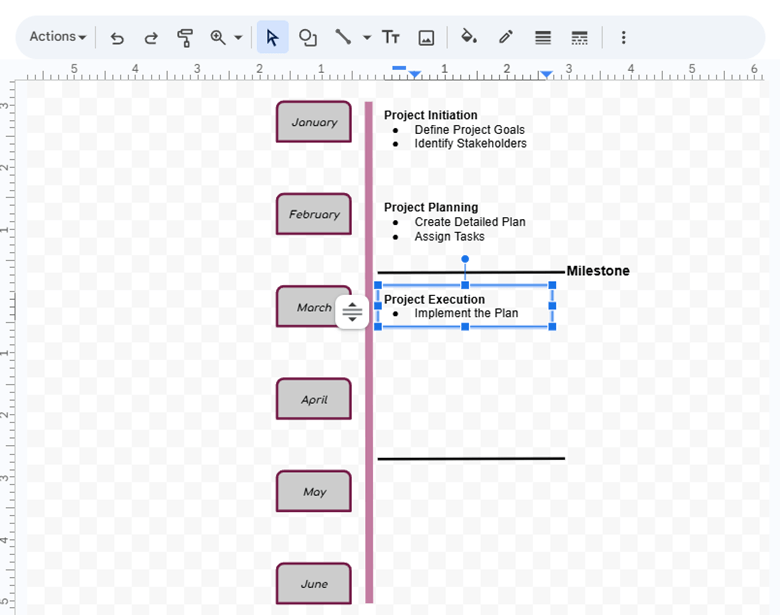
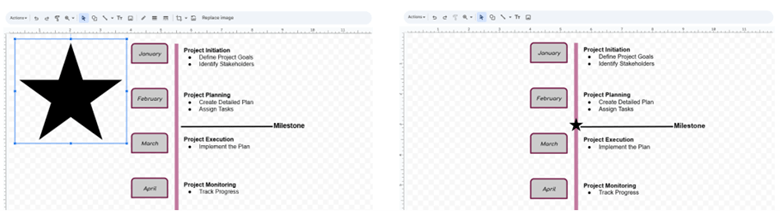
- Add Tasks or Events
Add vertical lines to connect time points with corresponding tasks. Click the Line tool and drag your cursor to the desired length. Copy and paste the line as needed.
Add more shapes or text boxes for tasks, events, and milestones.
- Add Images
Click the Image tool and choose how to access an image. If you use Google Images, type your image into the search bar, choose an image, and select Insert.
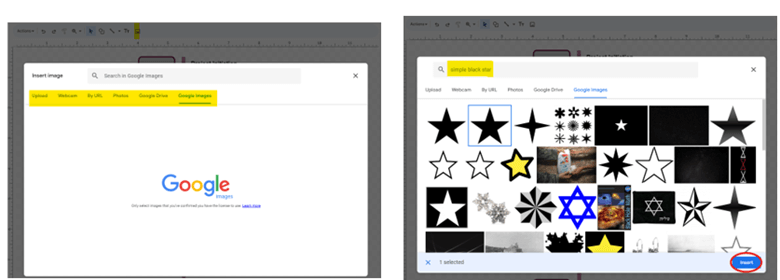
Resize the image and position it onto the timeline. Copy and paste it if you need more than one.
- Save the Timeline
Click Save and close to view your timeline within the document. To make changes, double-click the document to access the drawing canvas. (Note: Though Google Docs automatically saves work as you go, you need to manually save anything you did in the drawing canvas to close the box.)
If you don’t want to make a vertical timeline in Google Docs from scratch, you can use this vertical timeline template to get started. Check out these Google Docs and spreadsheet templates for your business, project, or personal needs.
Challenges and Limitations of Making a Timeline in Google Docs
Creating a timeline in Google Docs comes with several challenges and limitations. It can be time-consuming to start from scratch, especially if you don’t have design experience, as it requires you to manually add, draw, and align elements.
You might also face some of these additional challenges:
- Inconsistent Formatting: Maintaining uniformity in font styles, sizes, and spacing across the timeline can be difficult. This can lead to a visually unappealing or disorganized document.
- Human Error: The manual process increases the risk of mistakes, such as misplacing elements, incorrect dates, or alignment issues, which can disrupt the timeline’s accuracy and readability.
- Restricted Data Capacity: Google Docs has limited space, which makes it challenging to include large amounts of information without overcrowding the timeline.
- Limited Features: Google Docs lacks advanced timeline-specific tools, which can make it harder to design and modify complex timelines.
- Lack of Flexibility: Customizing the layout can be cumbersome. For example, if you create a horizontal template, you can’t simply flip it vertically; you have to rebuild the entire template from scratch.
- No Date Automation: Google Docs does not support automatic date population. Instead, it requires you to enter your timeline dates manually.
A timeline template saves time, streamlines the process, ensures consistency, and simplifies applying updates. It also provides a clear structure, making it easier to organize and present information in a visually appealing and cohesive format.
Looking for another way to track date-specific events? Check out this collection of Google calendar templates for more granular, date-specific scheduling and planning. If you’re working in Google Sheets, check out these templates for streamlining your scheduling process.
Create a Powerful Project Timeline With Smartsheet for Project Management
Timeline view in Smartsheet empowers users to plan, visualize, and collaborate on date-based work in real-time, enabling you to effortlessly organize tasks, track progress, and communicate status.
In just a few clicks, launch your project’s timeline on any sheet to visualize your work, understand the details, and adjust information, making it easy to track project progress, detect blockers, and communicate statuses.
Discover how timeline view in Smartsheet can help your team visualize date-based work and achieve greater efficiency and transparency across projects.
Learn more about timeline view in Smartsheet.