Video: Timeline in Google Sheets Tutorial

How to Make a Timeline in Google Sheets
To make a timeline in Google Sheets, open the document, enter your timeline data into a spreadsheet, and then convert it to a timeline. You can customize the design by selecting the data you want to display, grouping tasks, and color-coding cards.
Note: The timeline feature is available for Google Workspace users only.
Create a New Google Sheets Spreadsheet
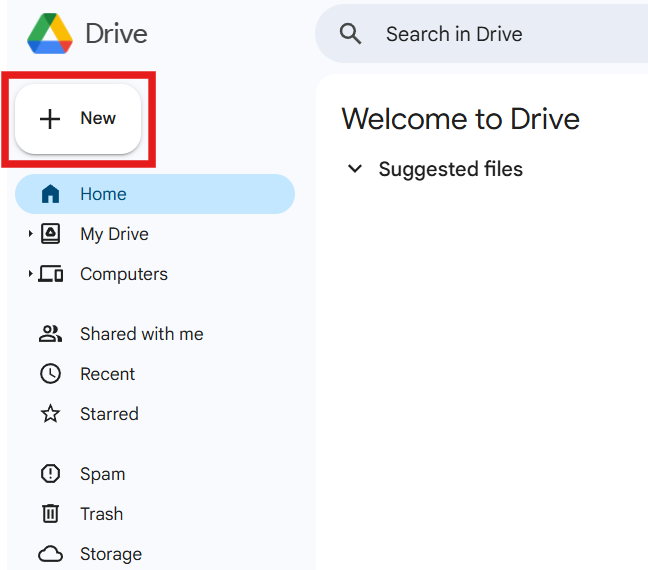
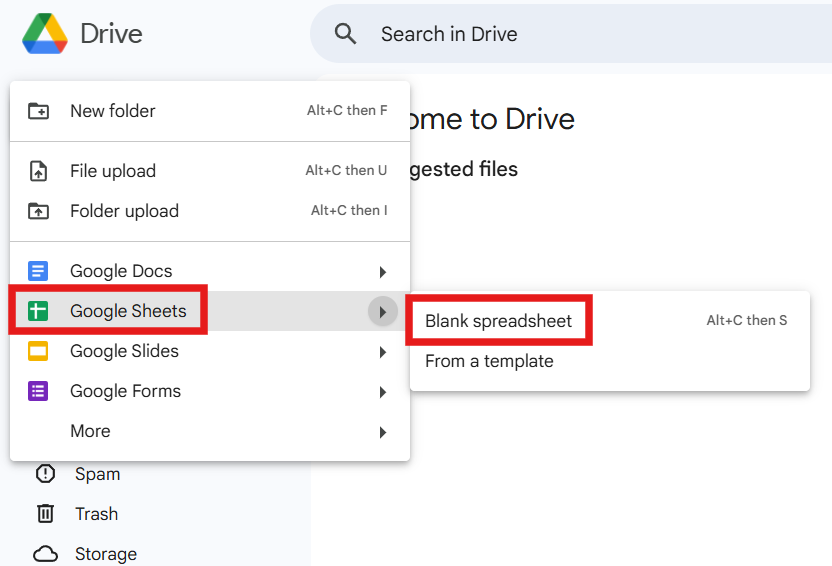
Click New > Google Sheets > Blank spreadsheet.
Name the Document
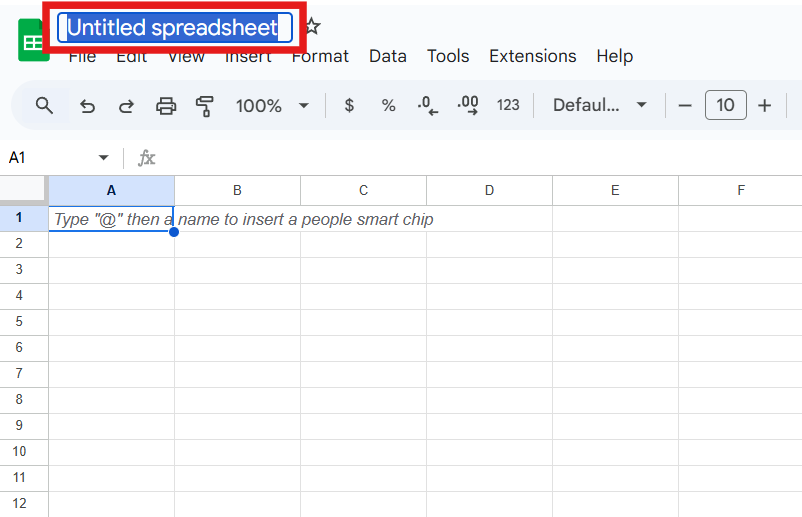
Name the document by replacing the placeholder text with the name of your project.
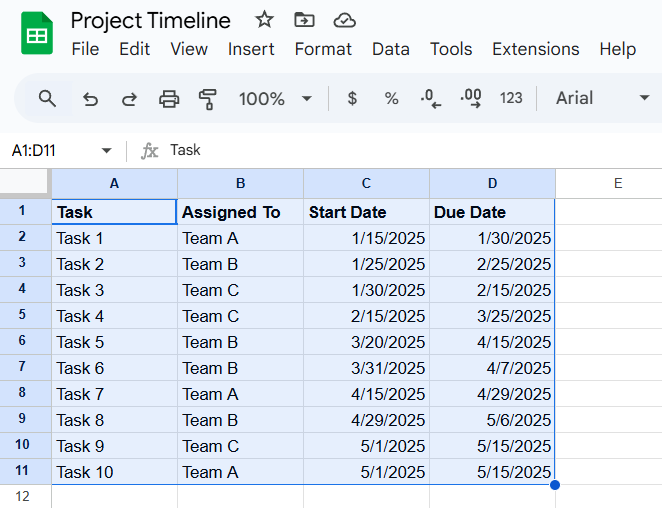
Enter Column Data
Enter your project data into columns. Include tasks, assignees, and start and end dates. You must enter each date in MM/DD/YYYY format. You can also add hyperlinks when they’re relevant to your project.
Note: You must enter Task and Start Date column data in order to populate a timeline.
Tip: Google allows you to tag users with the @ symbol. This is a great feature for collaborating and for assigning tasks to team members.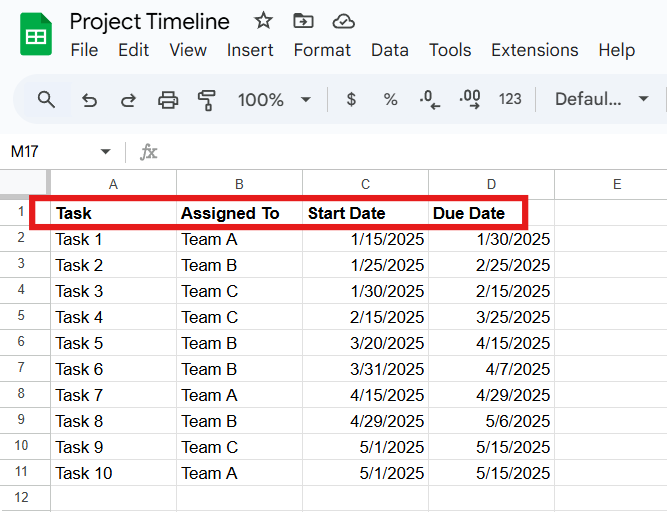
- Create a Timeline
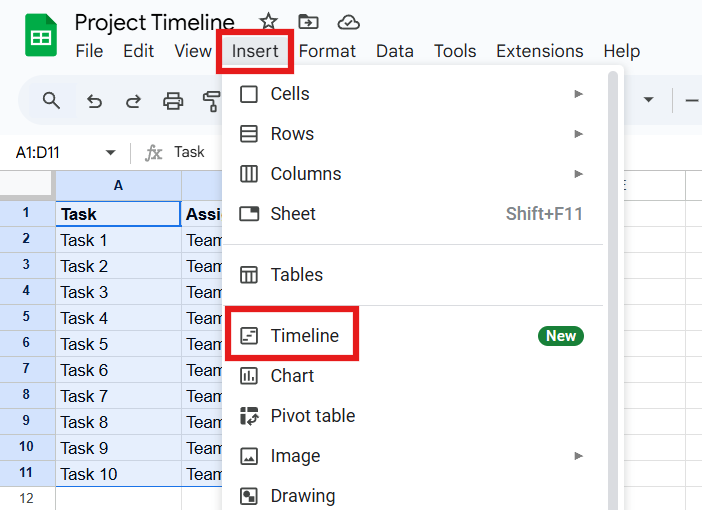
Click and drag your cursor to highlight the data you want to include in the timeline.
Tip: You can also select blank cells beyond the data you have filled out. Doing so will allow you to enter additional data at a later time, which will automatically be reflected in your timeline.
Click Insert > Timeline > OK.
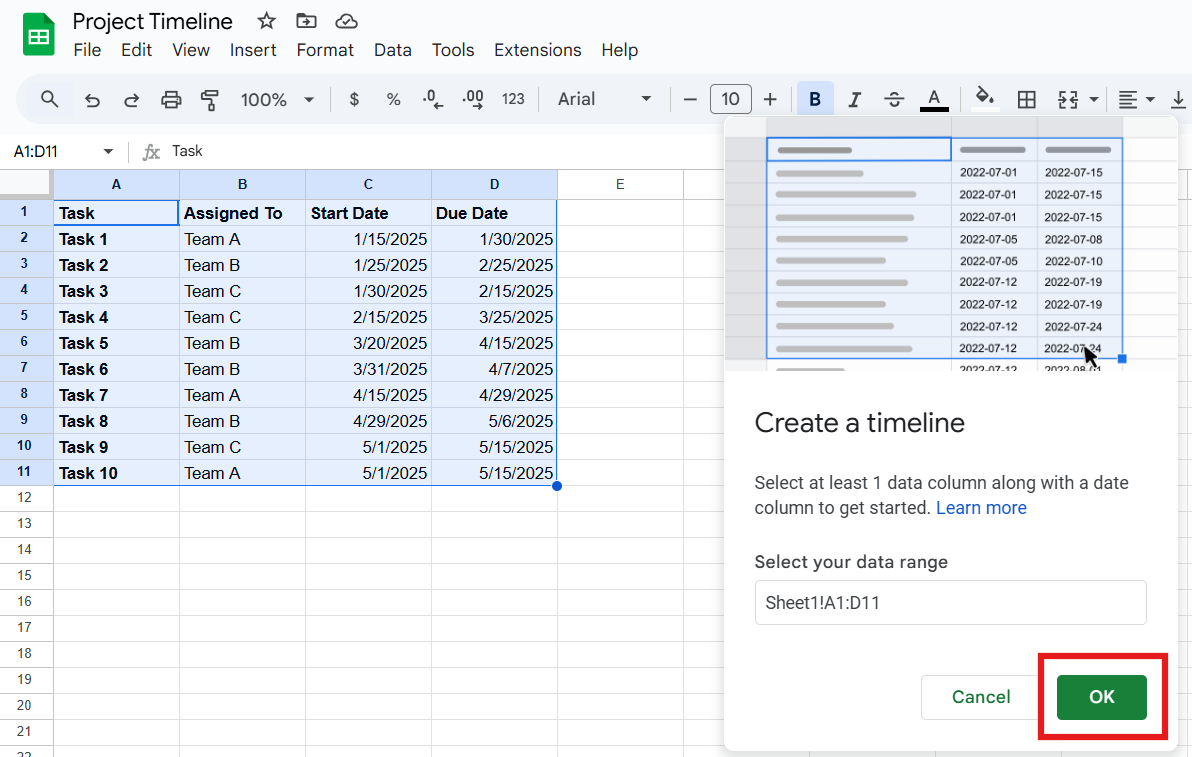
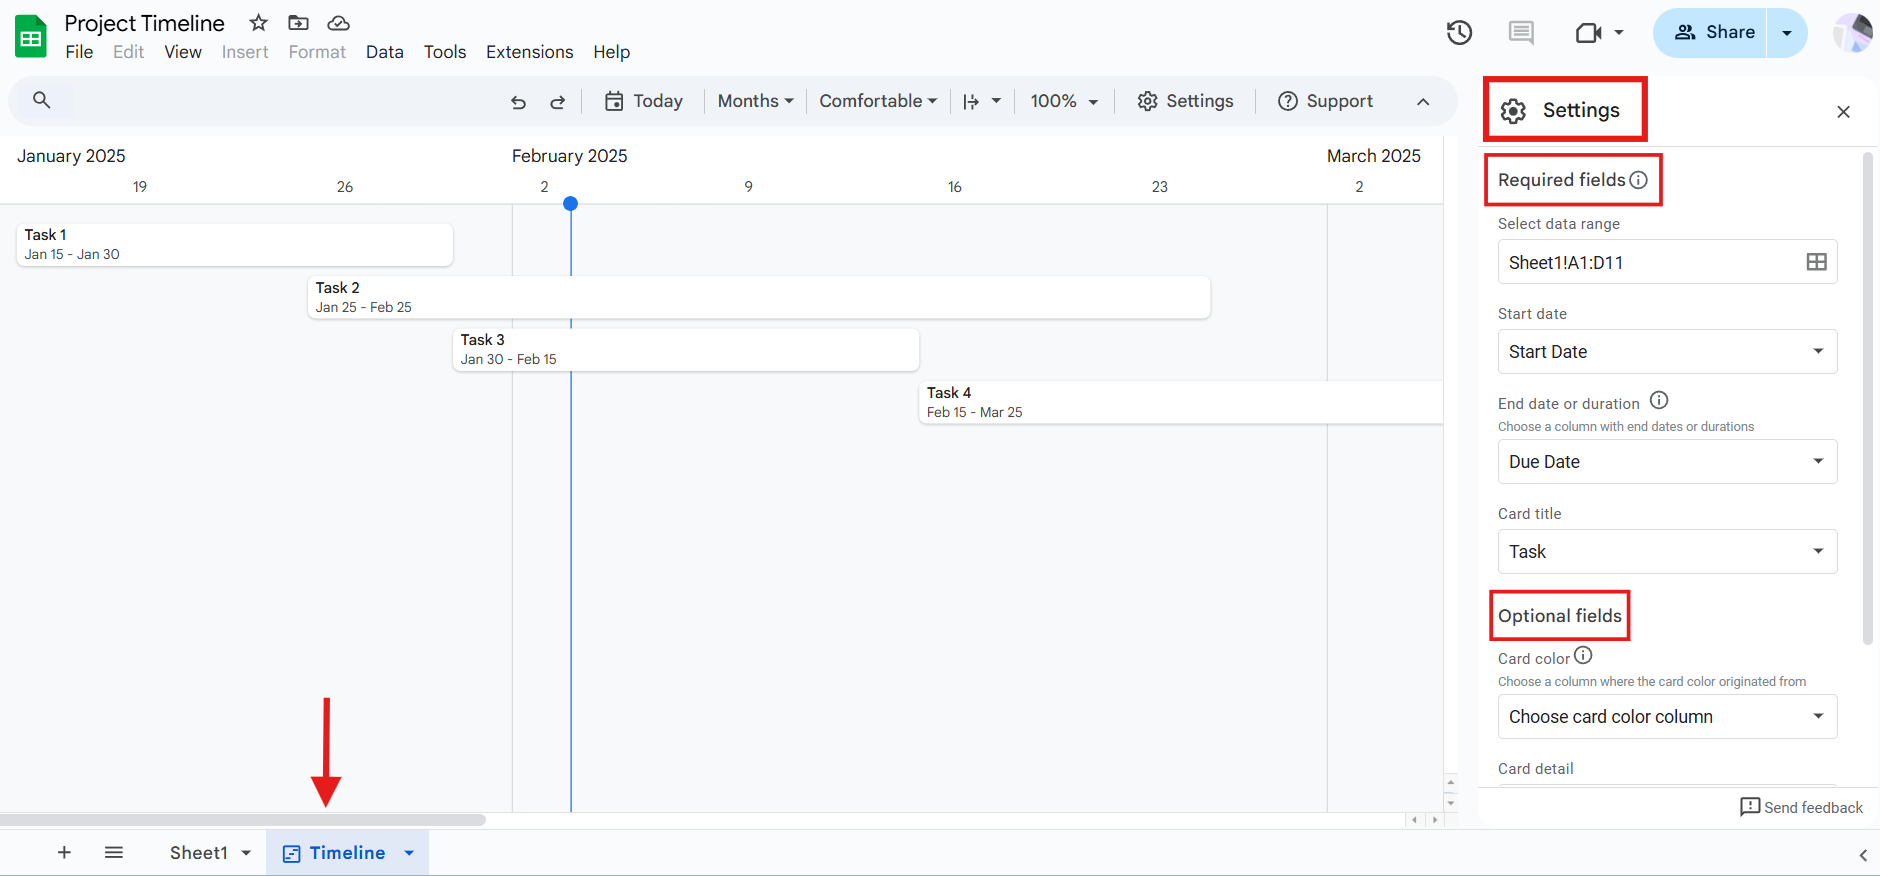
A new tab will open, and a timeline will populate with the data you highlighted in the spreadsheet. Use the Settings panel on the right with Required fields and Optional fields to customize the timeline.
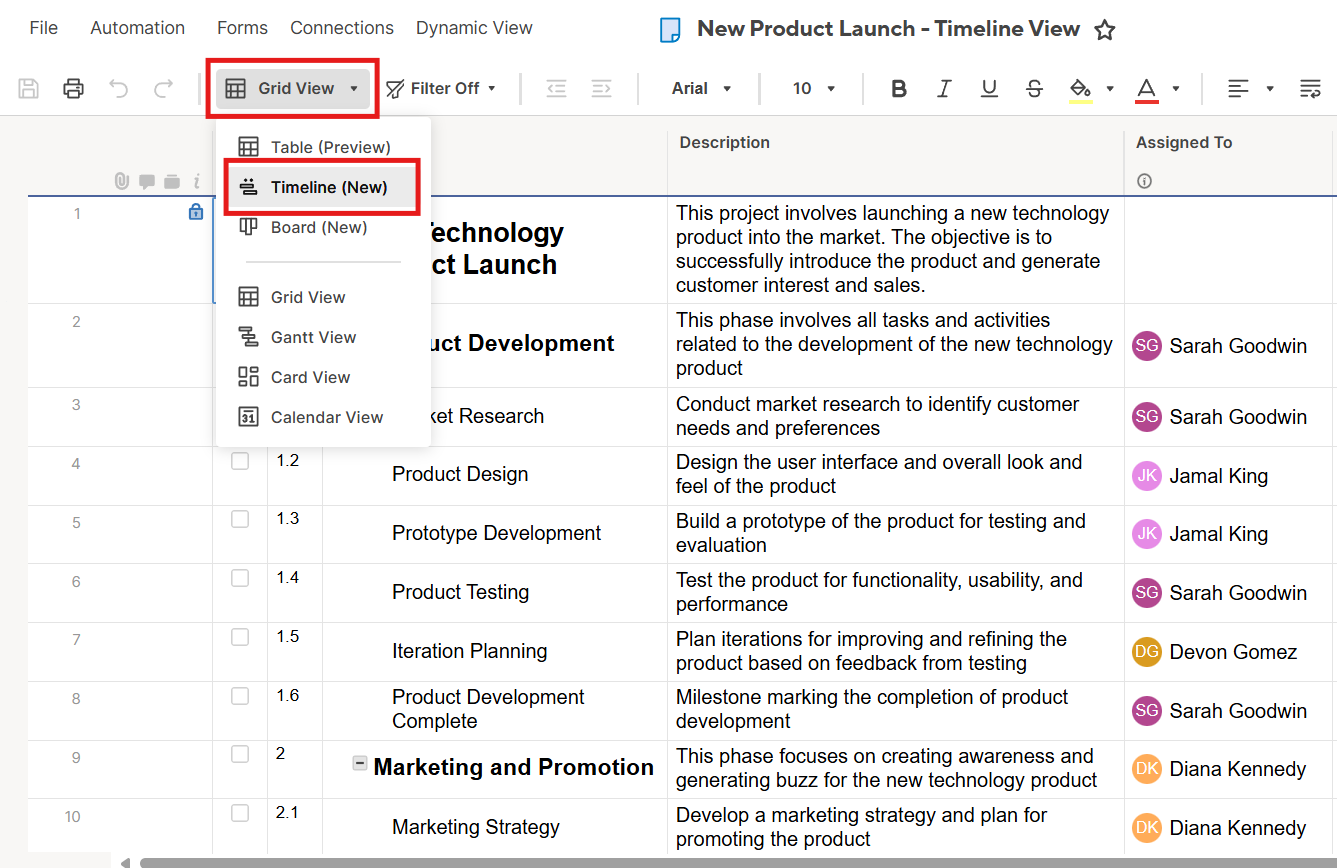
- Change Timeline View
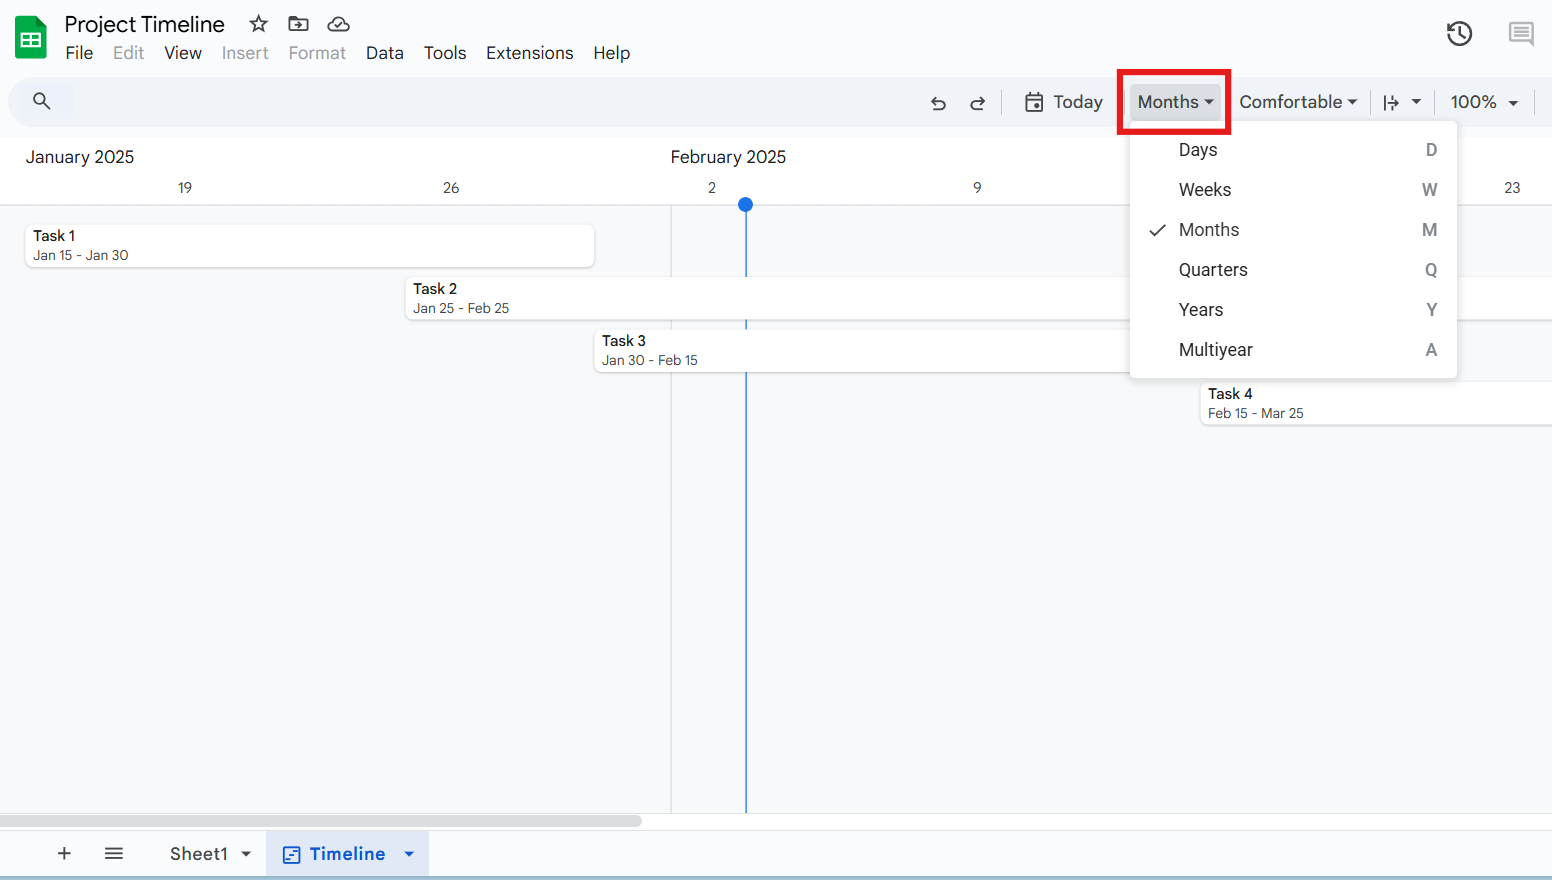
To change the view of your timeline, click the View timeline by tab, and select the time period you want to display.
- Customize Cards
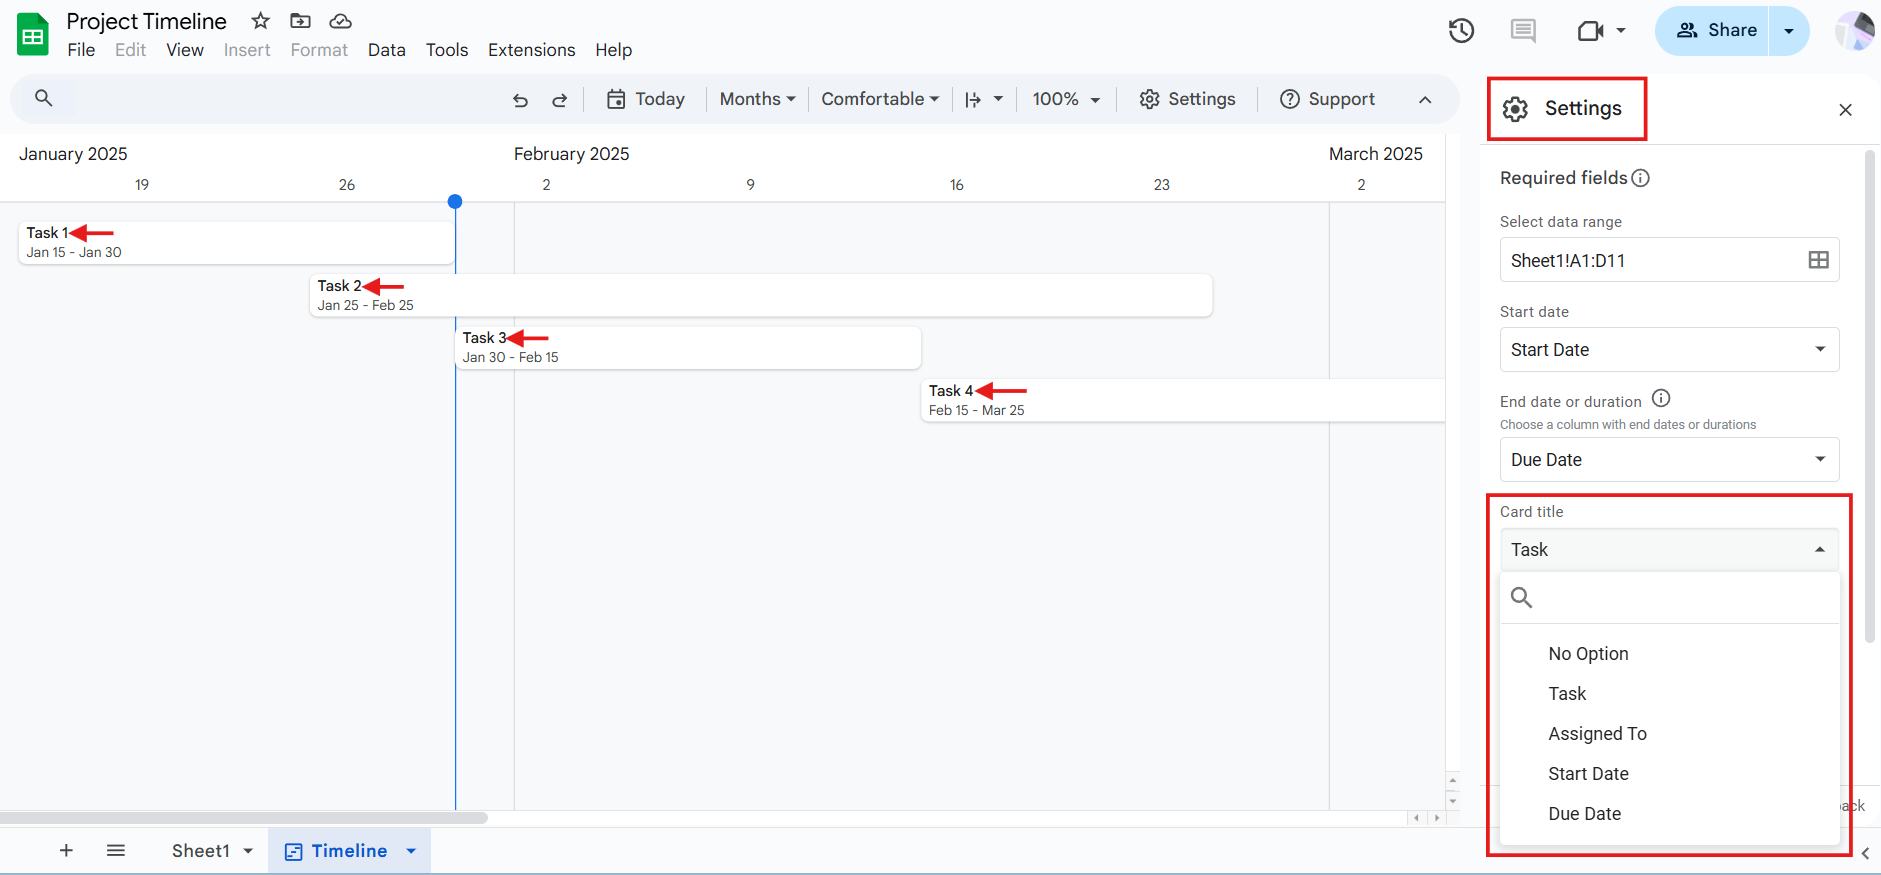
To change the card titles, click Settings and Card title. From the drop-down menu, click the data you want displayed as the card title. In the example below, Task is selected as the card title.
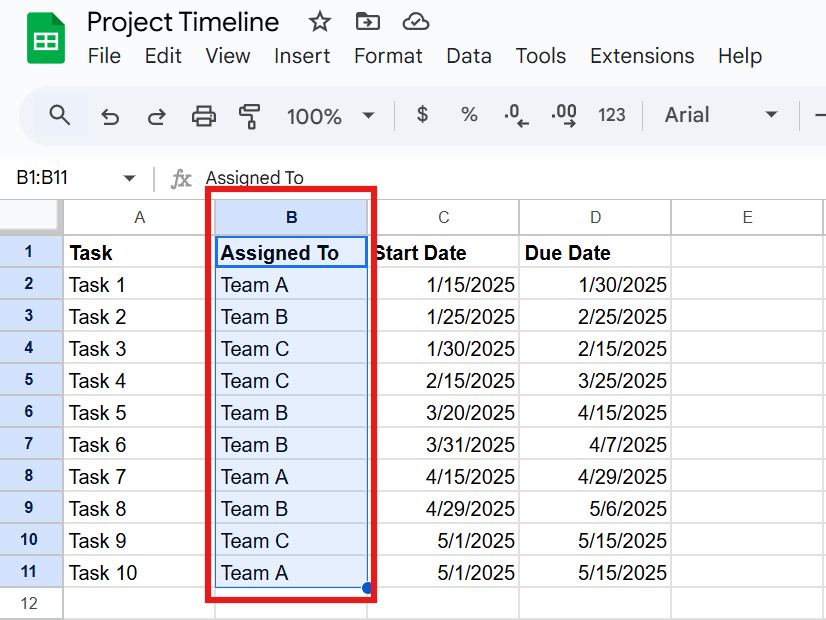
To customize the card colors, click back to the original Sheets tab. Highlight the column you want to color-code.
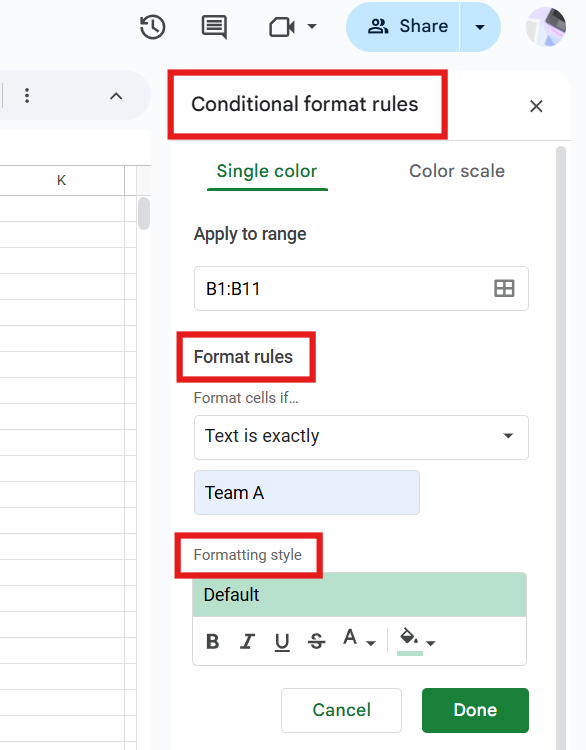
Click Format > Conditional formatting.
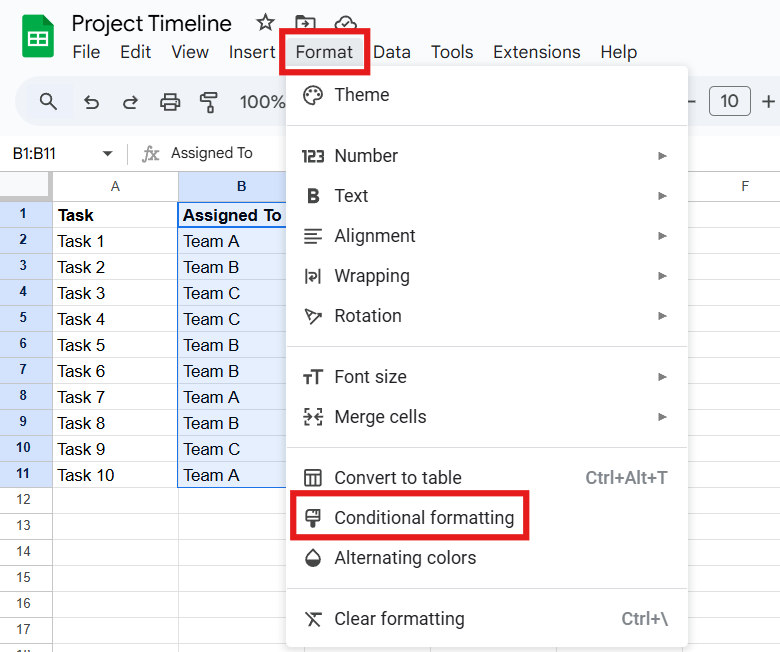
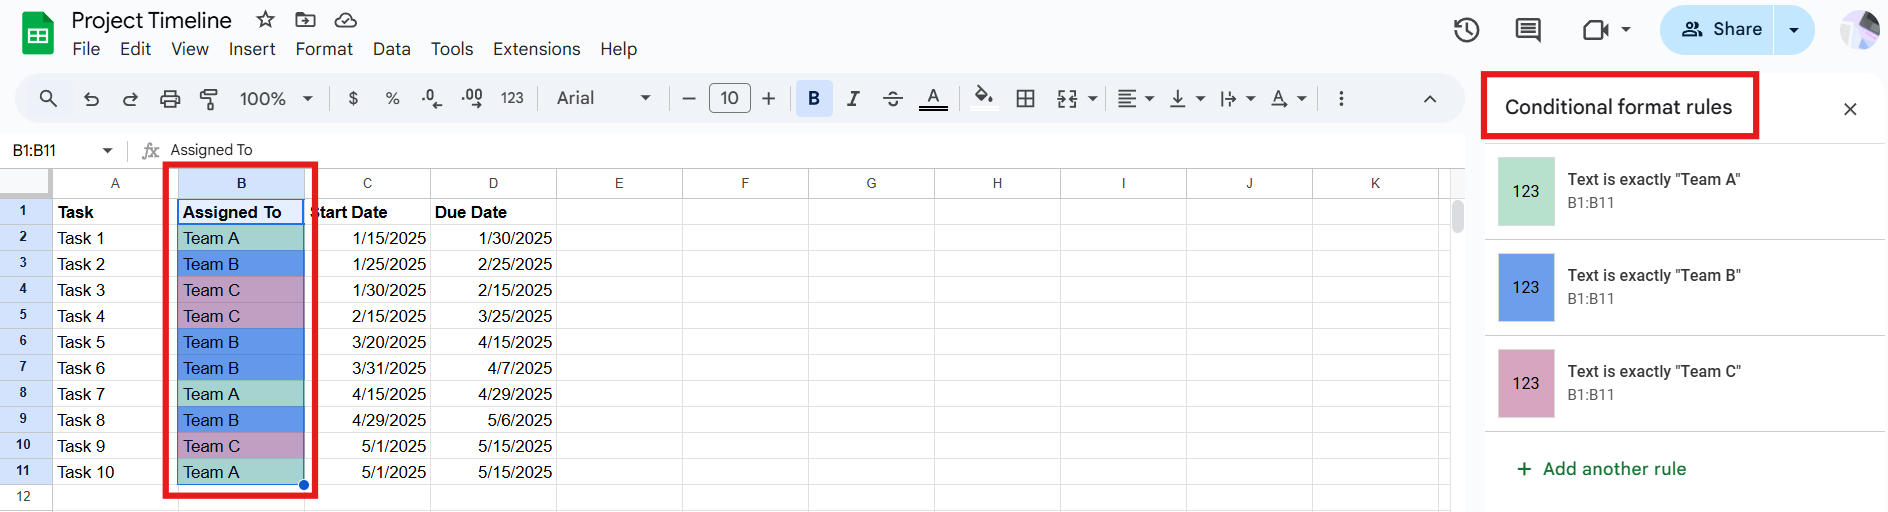
Apply your customizations using the Format rules and Formatting style menus. The applied rules will appear in a panel. The example below shows the Assigned To column highlighted and formatting rules applied to the team names.
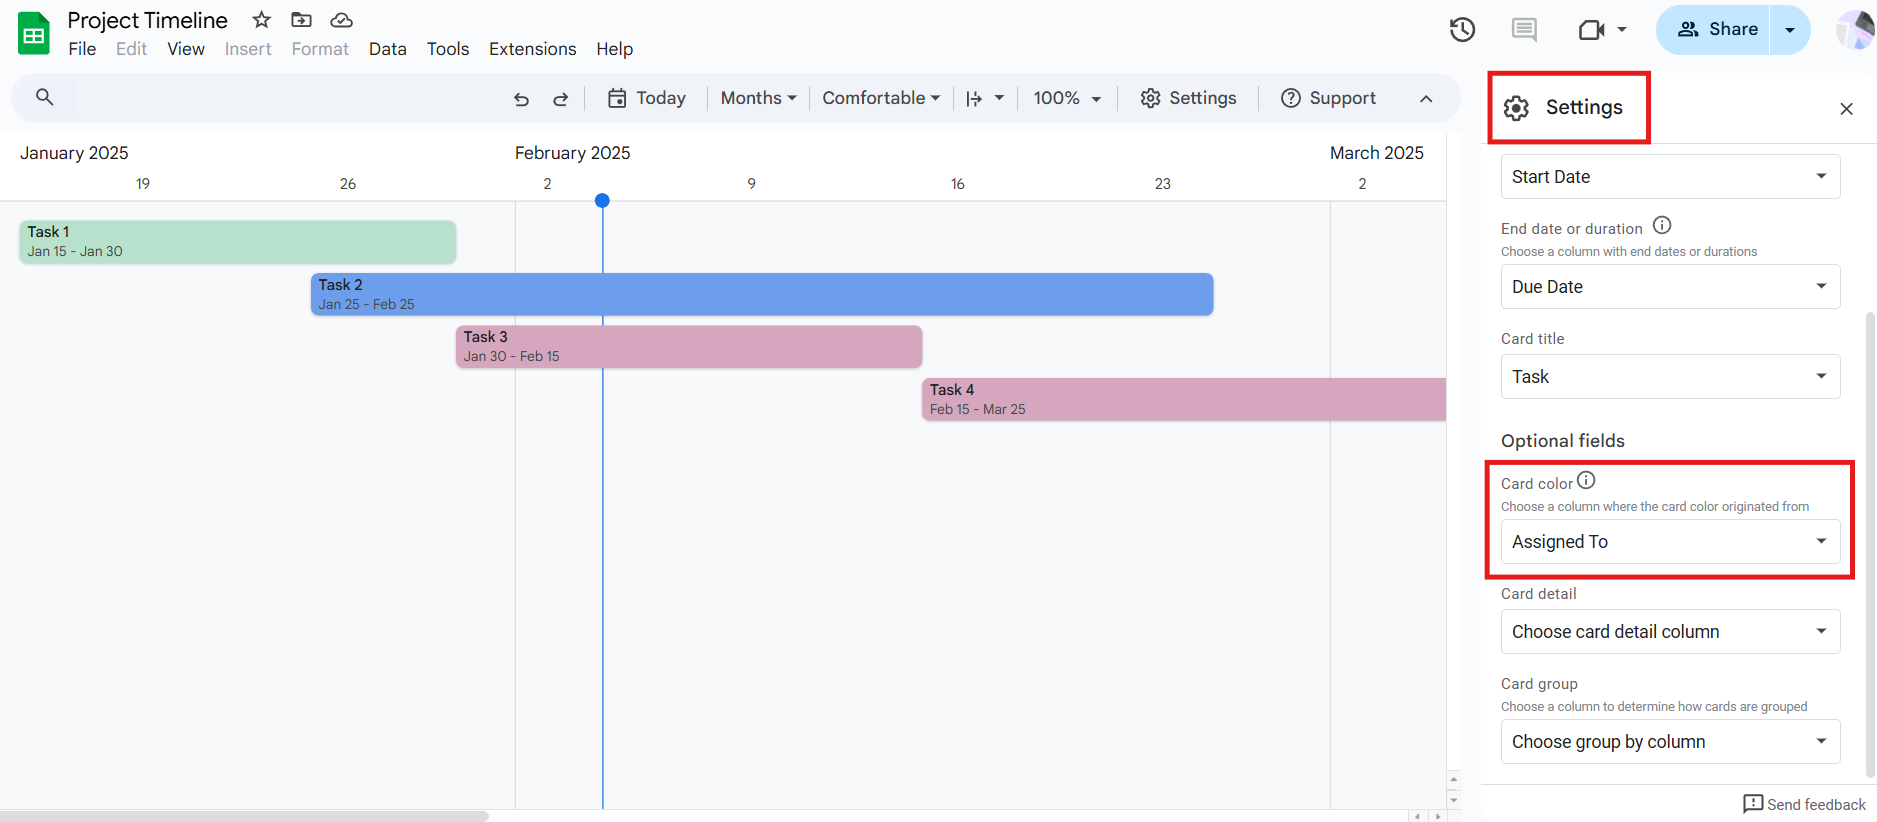
To see your conditional formatting in the timeline view, switch to the Timeline tab. Click Settings > Optional fields > Card color. From the drop-down menu, click the data column that you color-coded in the spreadsheet to apply the customizations to the timeline.
- Group Tasks
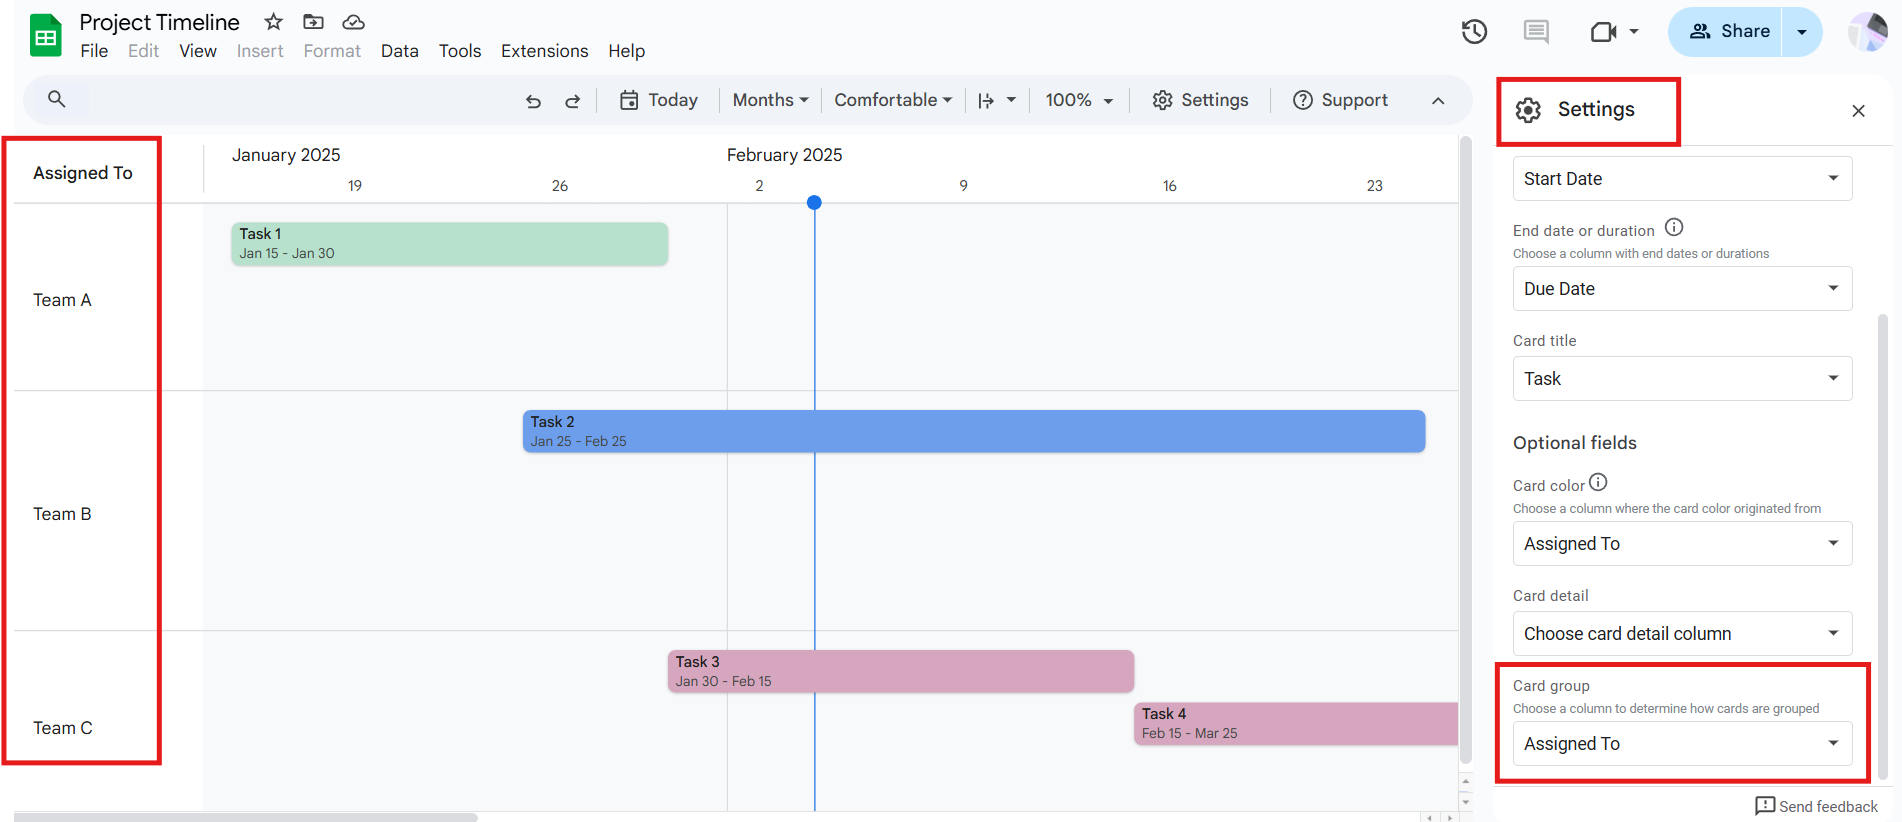
To group cards by specific data (task, assigned to, start date, due date, etc.), click Settings > Card group, and click the data you want to categorize your timeline by. The timeline will update with a new column on the far left based on your selection. The example below shows the Card group as Assigned To.
Manage your project’s budget, marketing, content, and employees using a Google calendar template. Learn more from Google project management templates.
Google Sheets Timeline Templates for Project Management
Project management involves organizing project tasks and determining their timelines to ensure a project meets its deadline. Use timeline templates to manage projects and provide visual tools for team members and stakeholders to stay aligned.
Check out these project management timeline templates to organize your project tasks and track their durations.
- Gantt Chart With Timeline Template
Use a Gantt chart with timeline template to track the start and end dates of project tasks. A bar chart provides a visual representation of the duration of each task.

Check out this complete collection of Gantt chart templates in Google Sheets.
- Project Timeline Template
Use a project timeline template to easily visualize project phases and their associated tasks. The timeline offers quarterly, monthly, and weekly views.
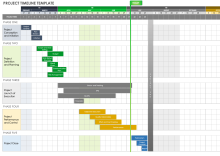
Check out this collection of timeline templates for Google Docs, Sheets, and Slides.
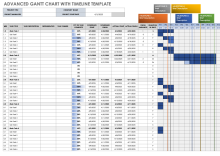
- Advanced Gantt Chart with Timeline Template
Use an advanced Gantt chart with timeline template to capture task descriptions, dependencies, and owners, along with planned and actual start and end dates. This template also provides space to enter milestones so that they are easy to identify.
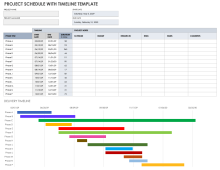
- Project Schedule with Timeline Template
Use a project schedule with timeline template to list project phases and track budget, resources, risks, and issues.
Streamline your scheduling process and enhance productivity with a Google Sheets scheduling template.
How to Customize a Timeline in Smartsheet
Timeline view in Smartsheet enhances project visualization and management within a set timeframe. It offers advanced features such as filters, grouping, collaboration, and more.
Follow the steps below to effectively use the Timeline view in Smartsheet.
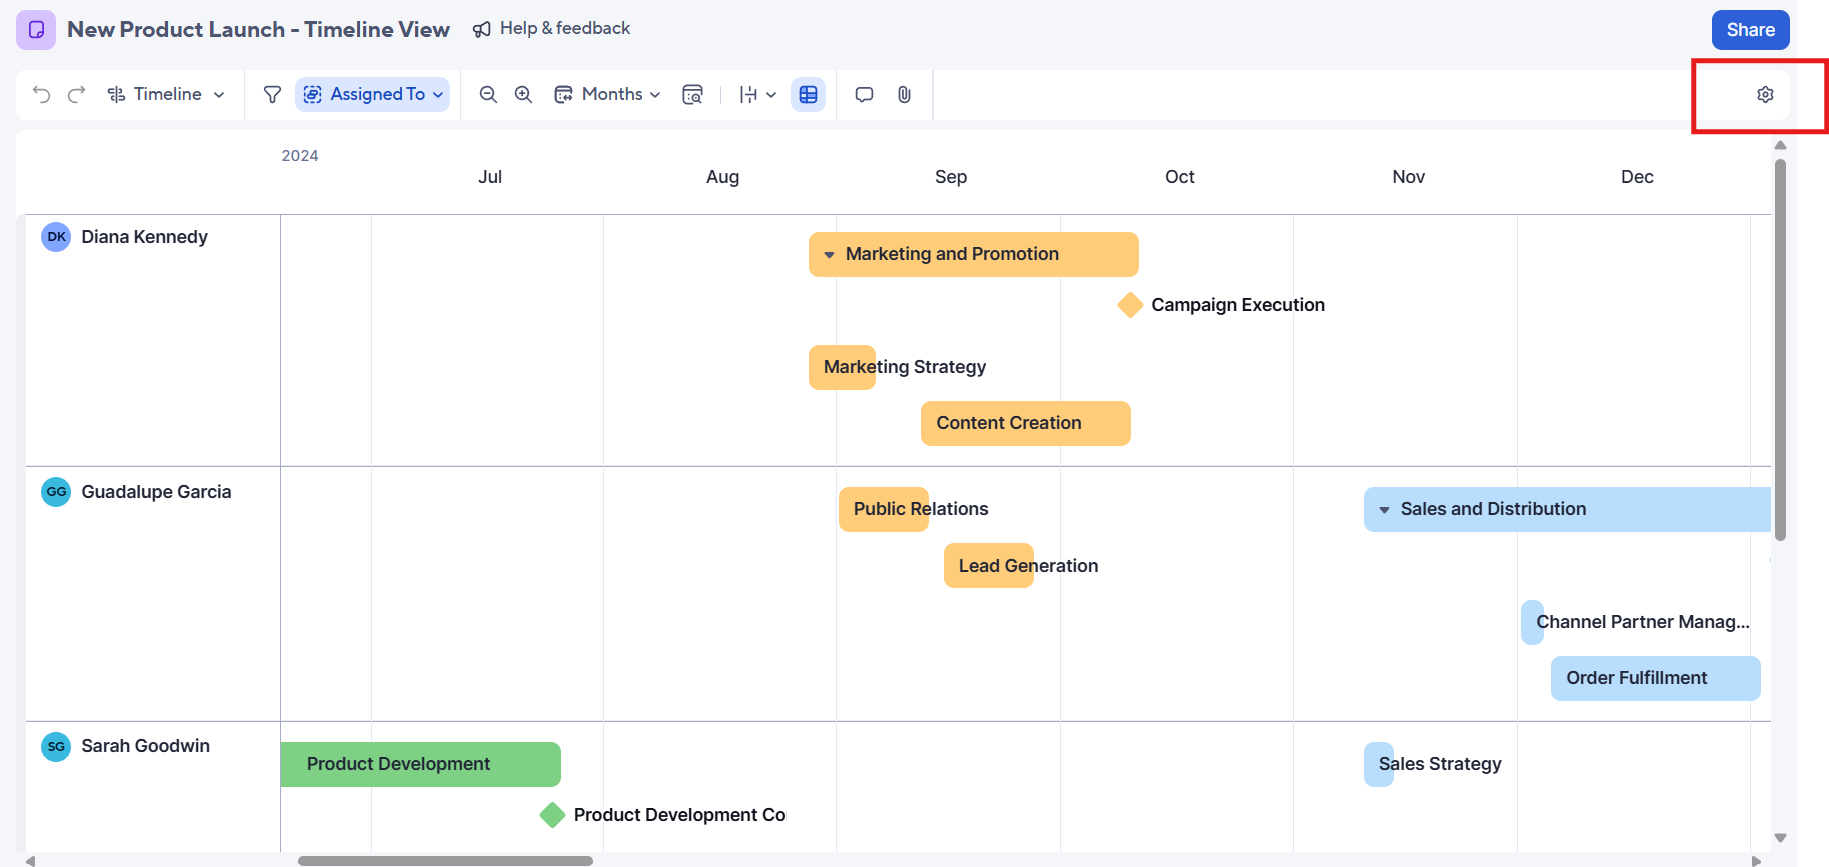
- Open Timeline View
From your sheet, click the layout switcher and select Timeline from the drop-down menu.
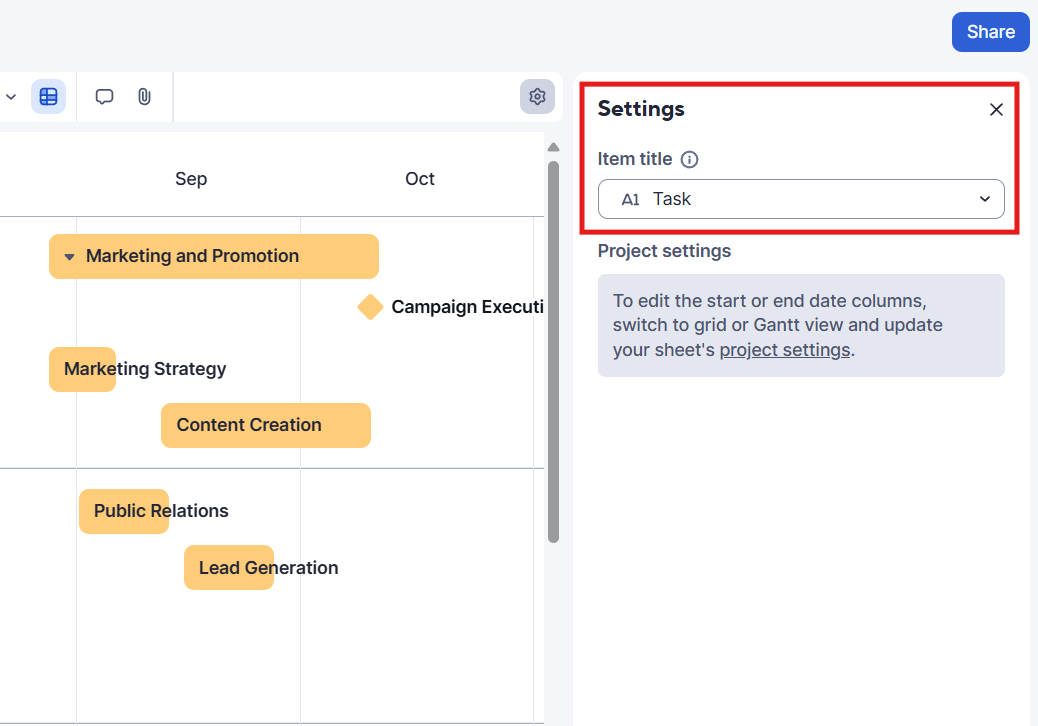
- Customize Bar Titles
To change the text displayed in your task bars, click the Settings icon in the top-right corner, and click your bar title from the Item title drop-down menu. In the example below, Task is selected.
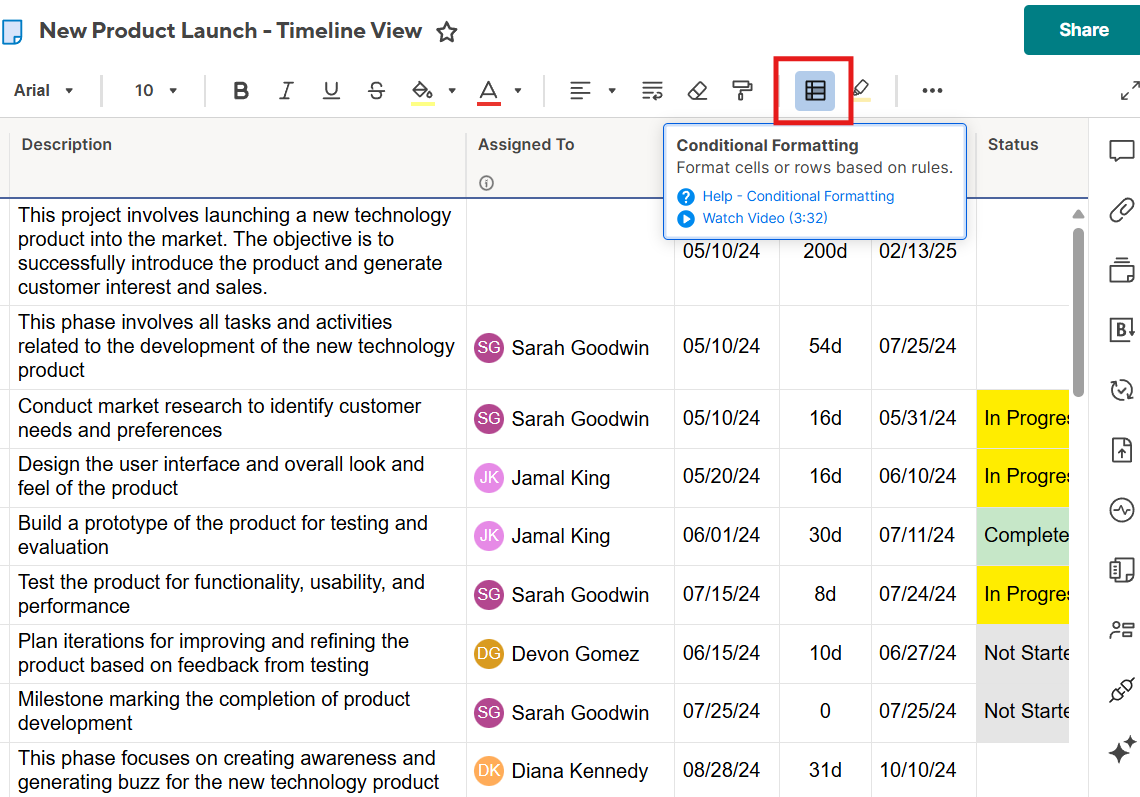
- Customize Bar Colors
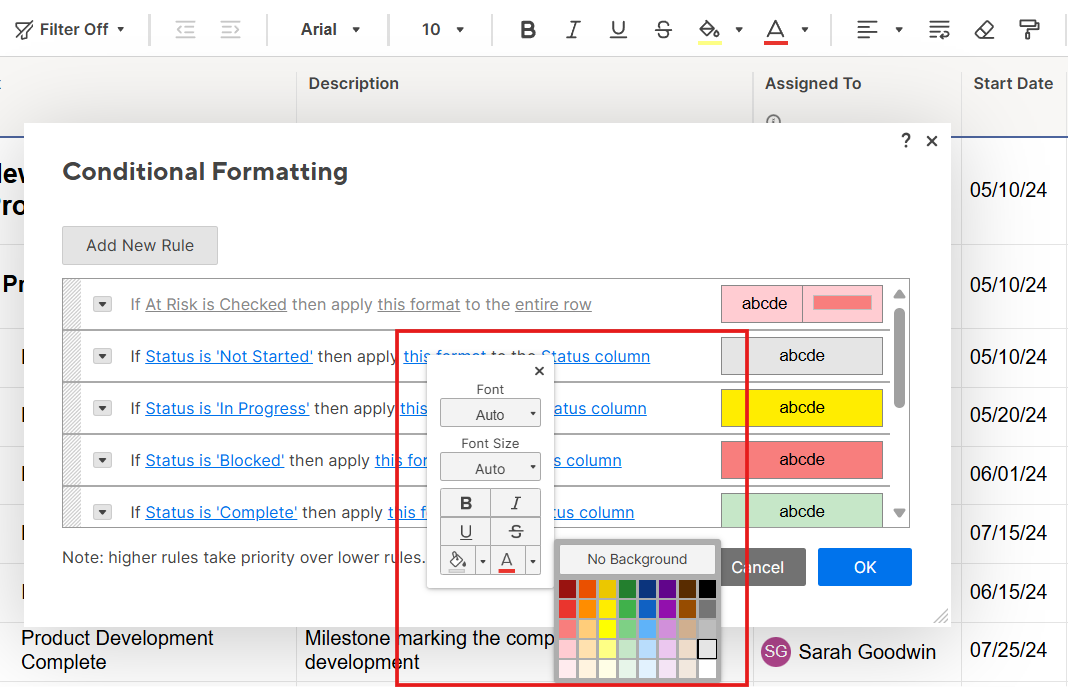
To customize the task bar colors, use conditional formatting. Switch back to Grid view, and select the Conditional Formatting icon.
Create conditional formatting rules and apply task bar colors. Click OK. The conditional formatting rules will apply to your timeline.
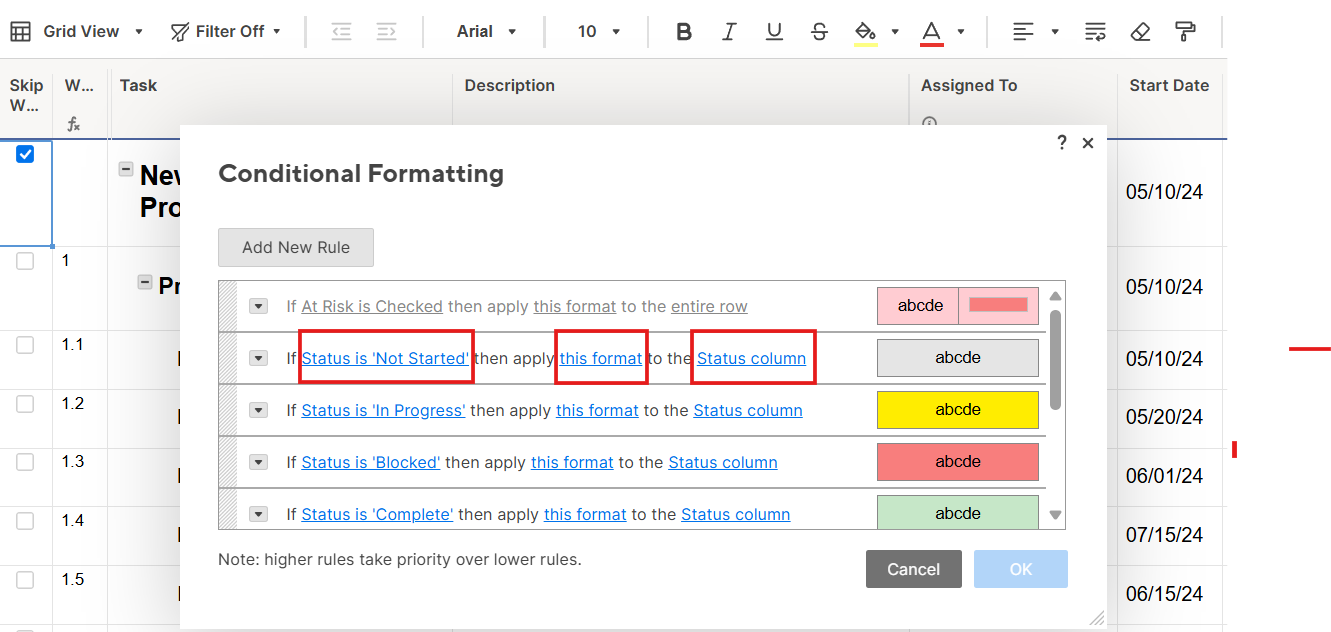
You can also customize the task bar text font, font size, and more.
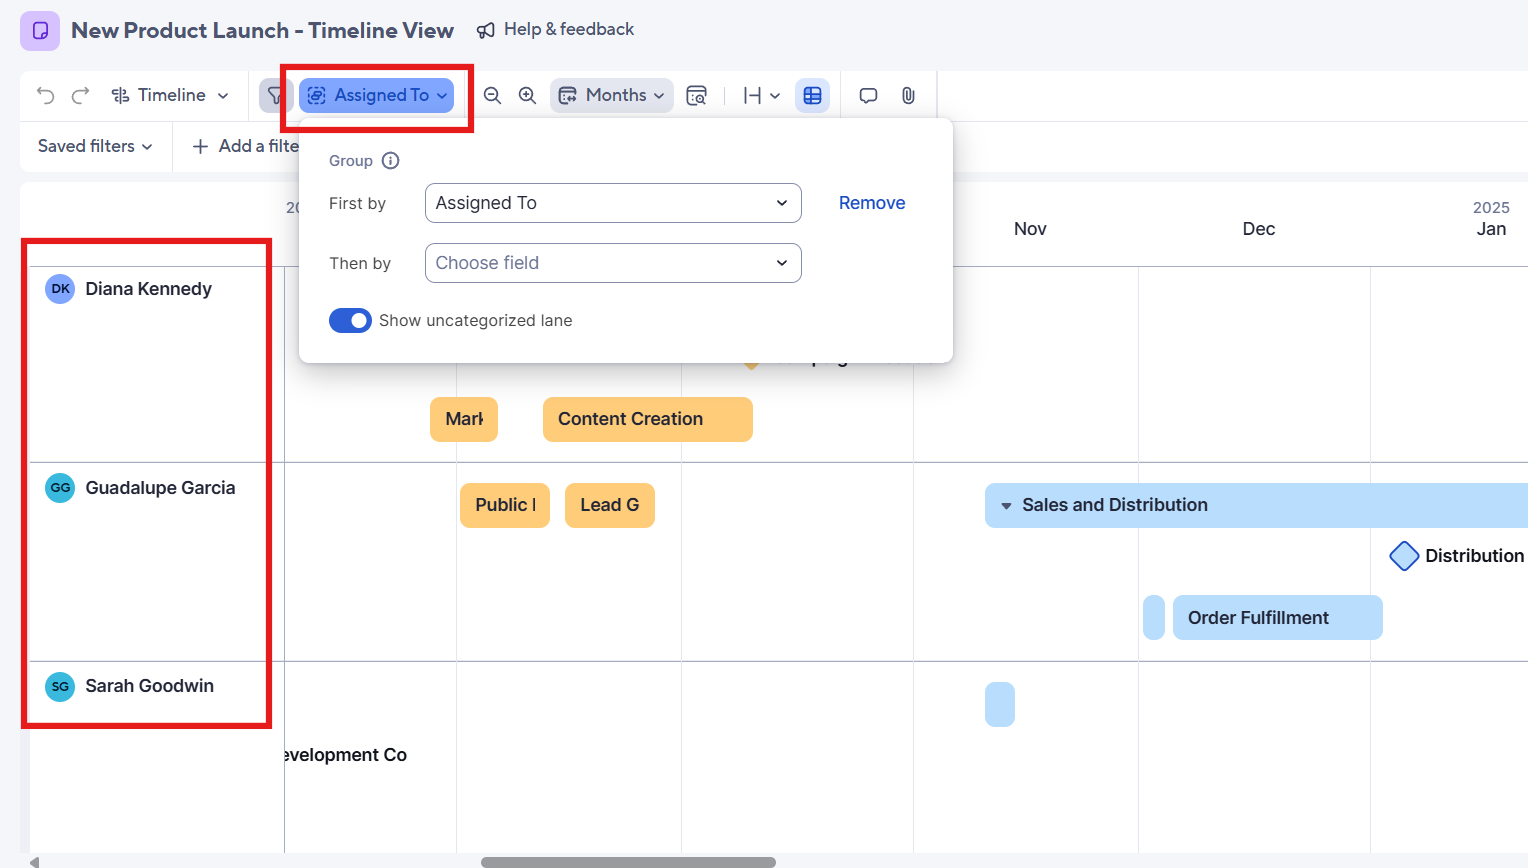
- Customize Grouping
You can also group your tasks to visualize them by specific criteria, such as assignee or status. To group your tasks, switch to Timeline view, and click the Group by drop-down menu from the toolbar. Click which data you want your card grouped into. You can also add a second level of grouping. The timeline will update the column on the far left based on your selection.
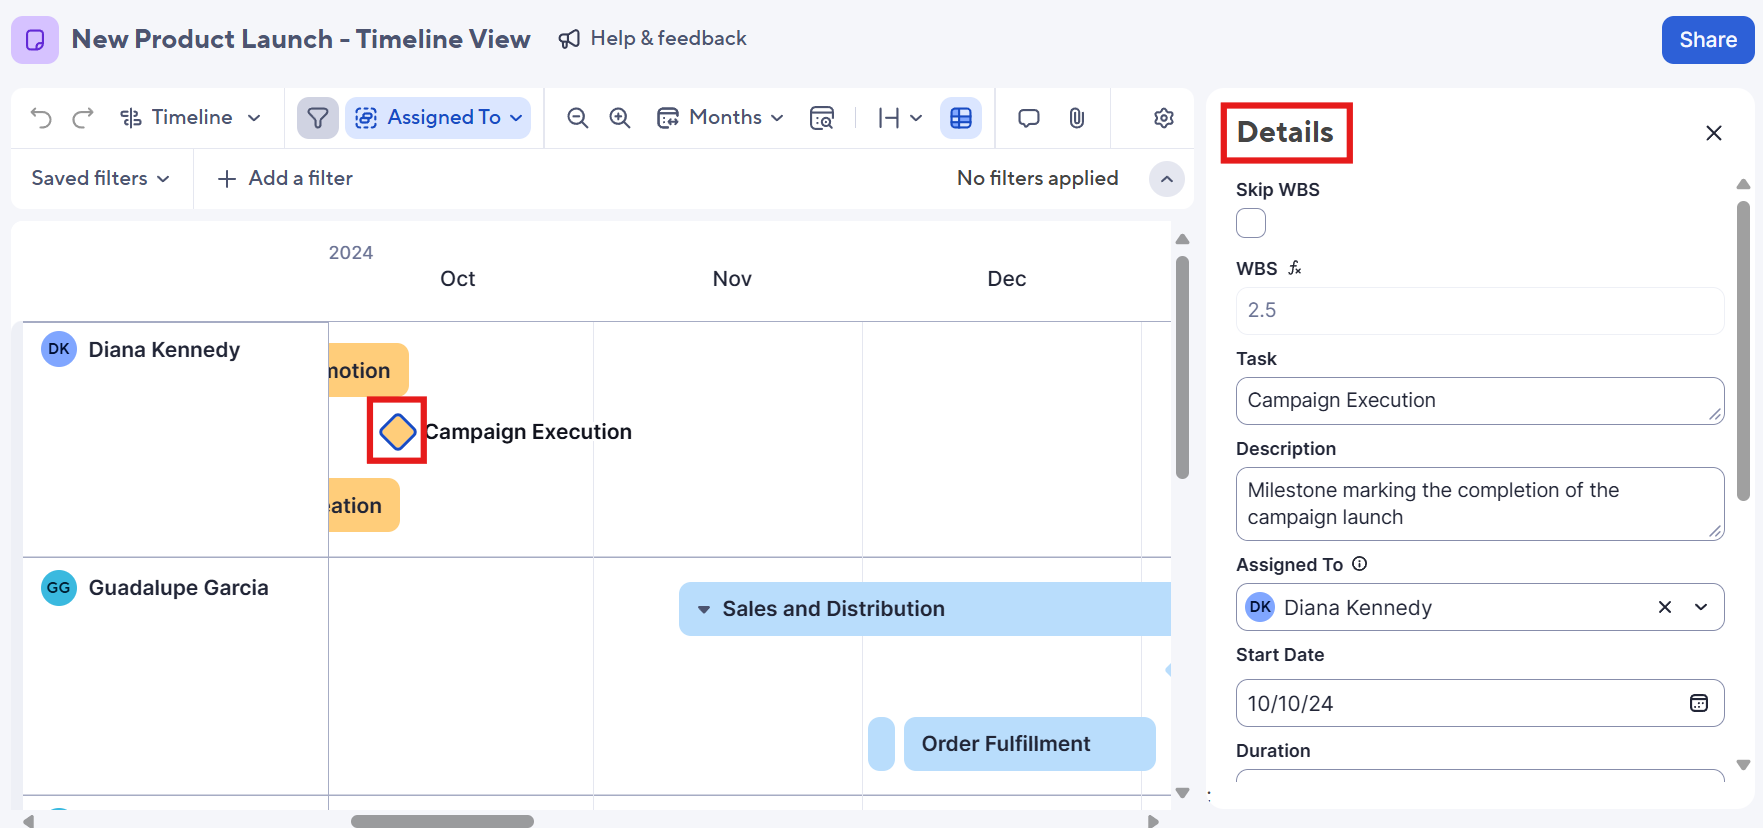
- Customize Milestones
To customize milestones, double-click a milestone. In the Details menu that opens to the right, change the name, description, assignee, and more.
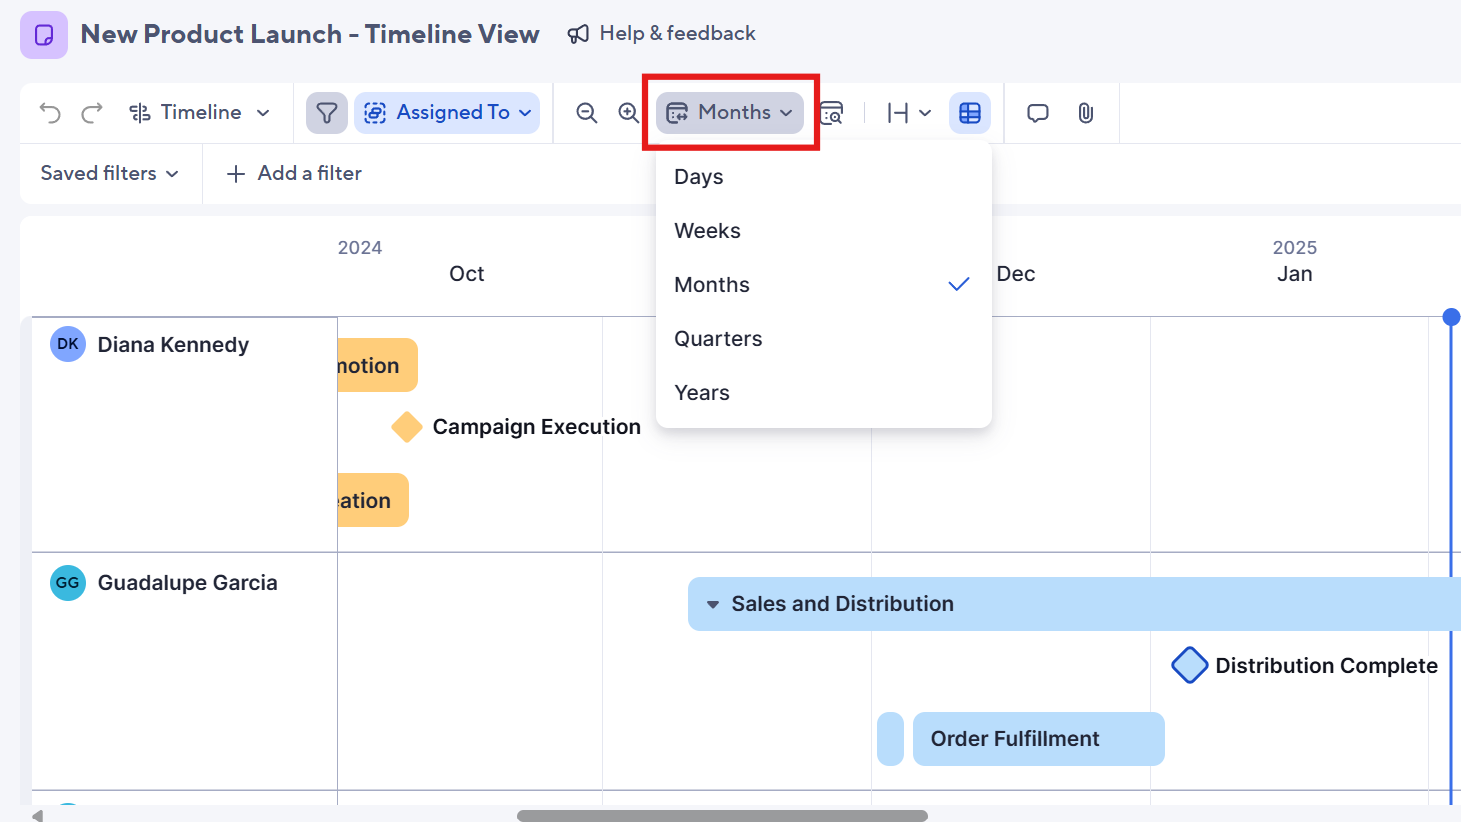
- Customize the View
To change the Timeline view to days, weeks, months, quarters, or years, click the Change timescale drop-down menu, and select a view.
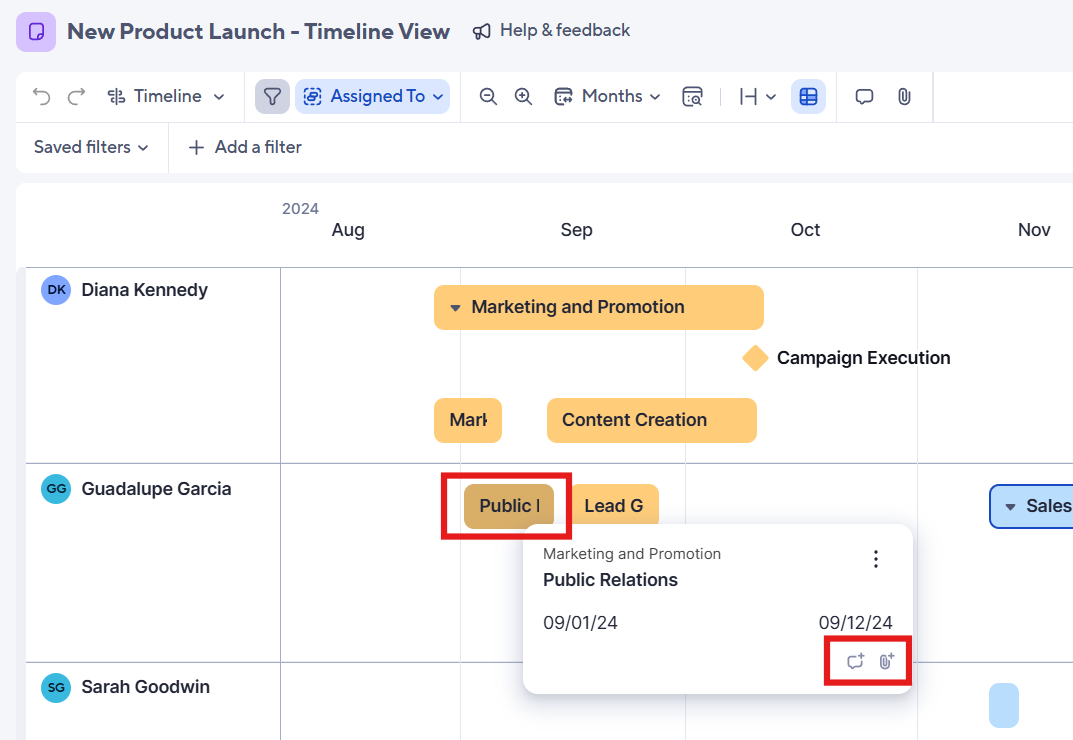
- Add Comments and Attachments
To add comments and attachments, hover over a task. Click the comment or attachment icon.
Create Powerful, Customizable Timelines in Smartsheet
Timeline view in Smartsheet empowers users to plan, visualize, and collaborate on date-based work in real-time, enabling you to effortlessly organize tasks, track progress, and communicate status.
In just a few clicks, launch your project’s timeline on any sheet to visualize your work, understand the details, and adjust information, making it easy to track project progress, detect blockers, and communicate statuses.
Discover how timeline view in Smartsheet can help your team visualize date-based work and achieve greater efficiency and transparency across projects.
Learn more about timeline view in Smartsheet.